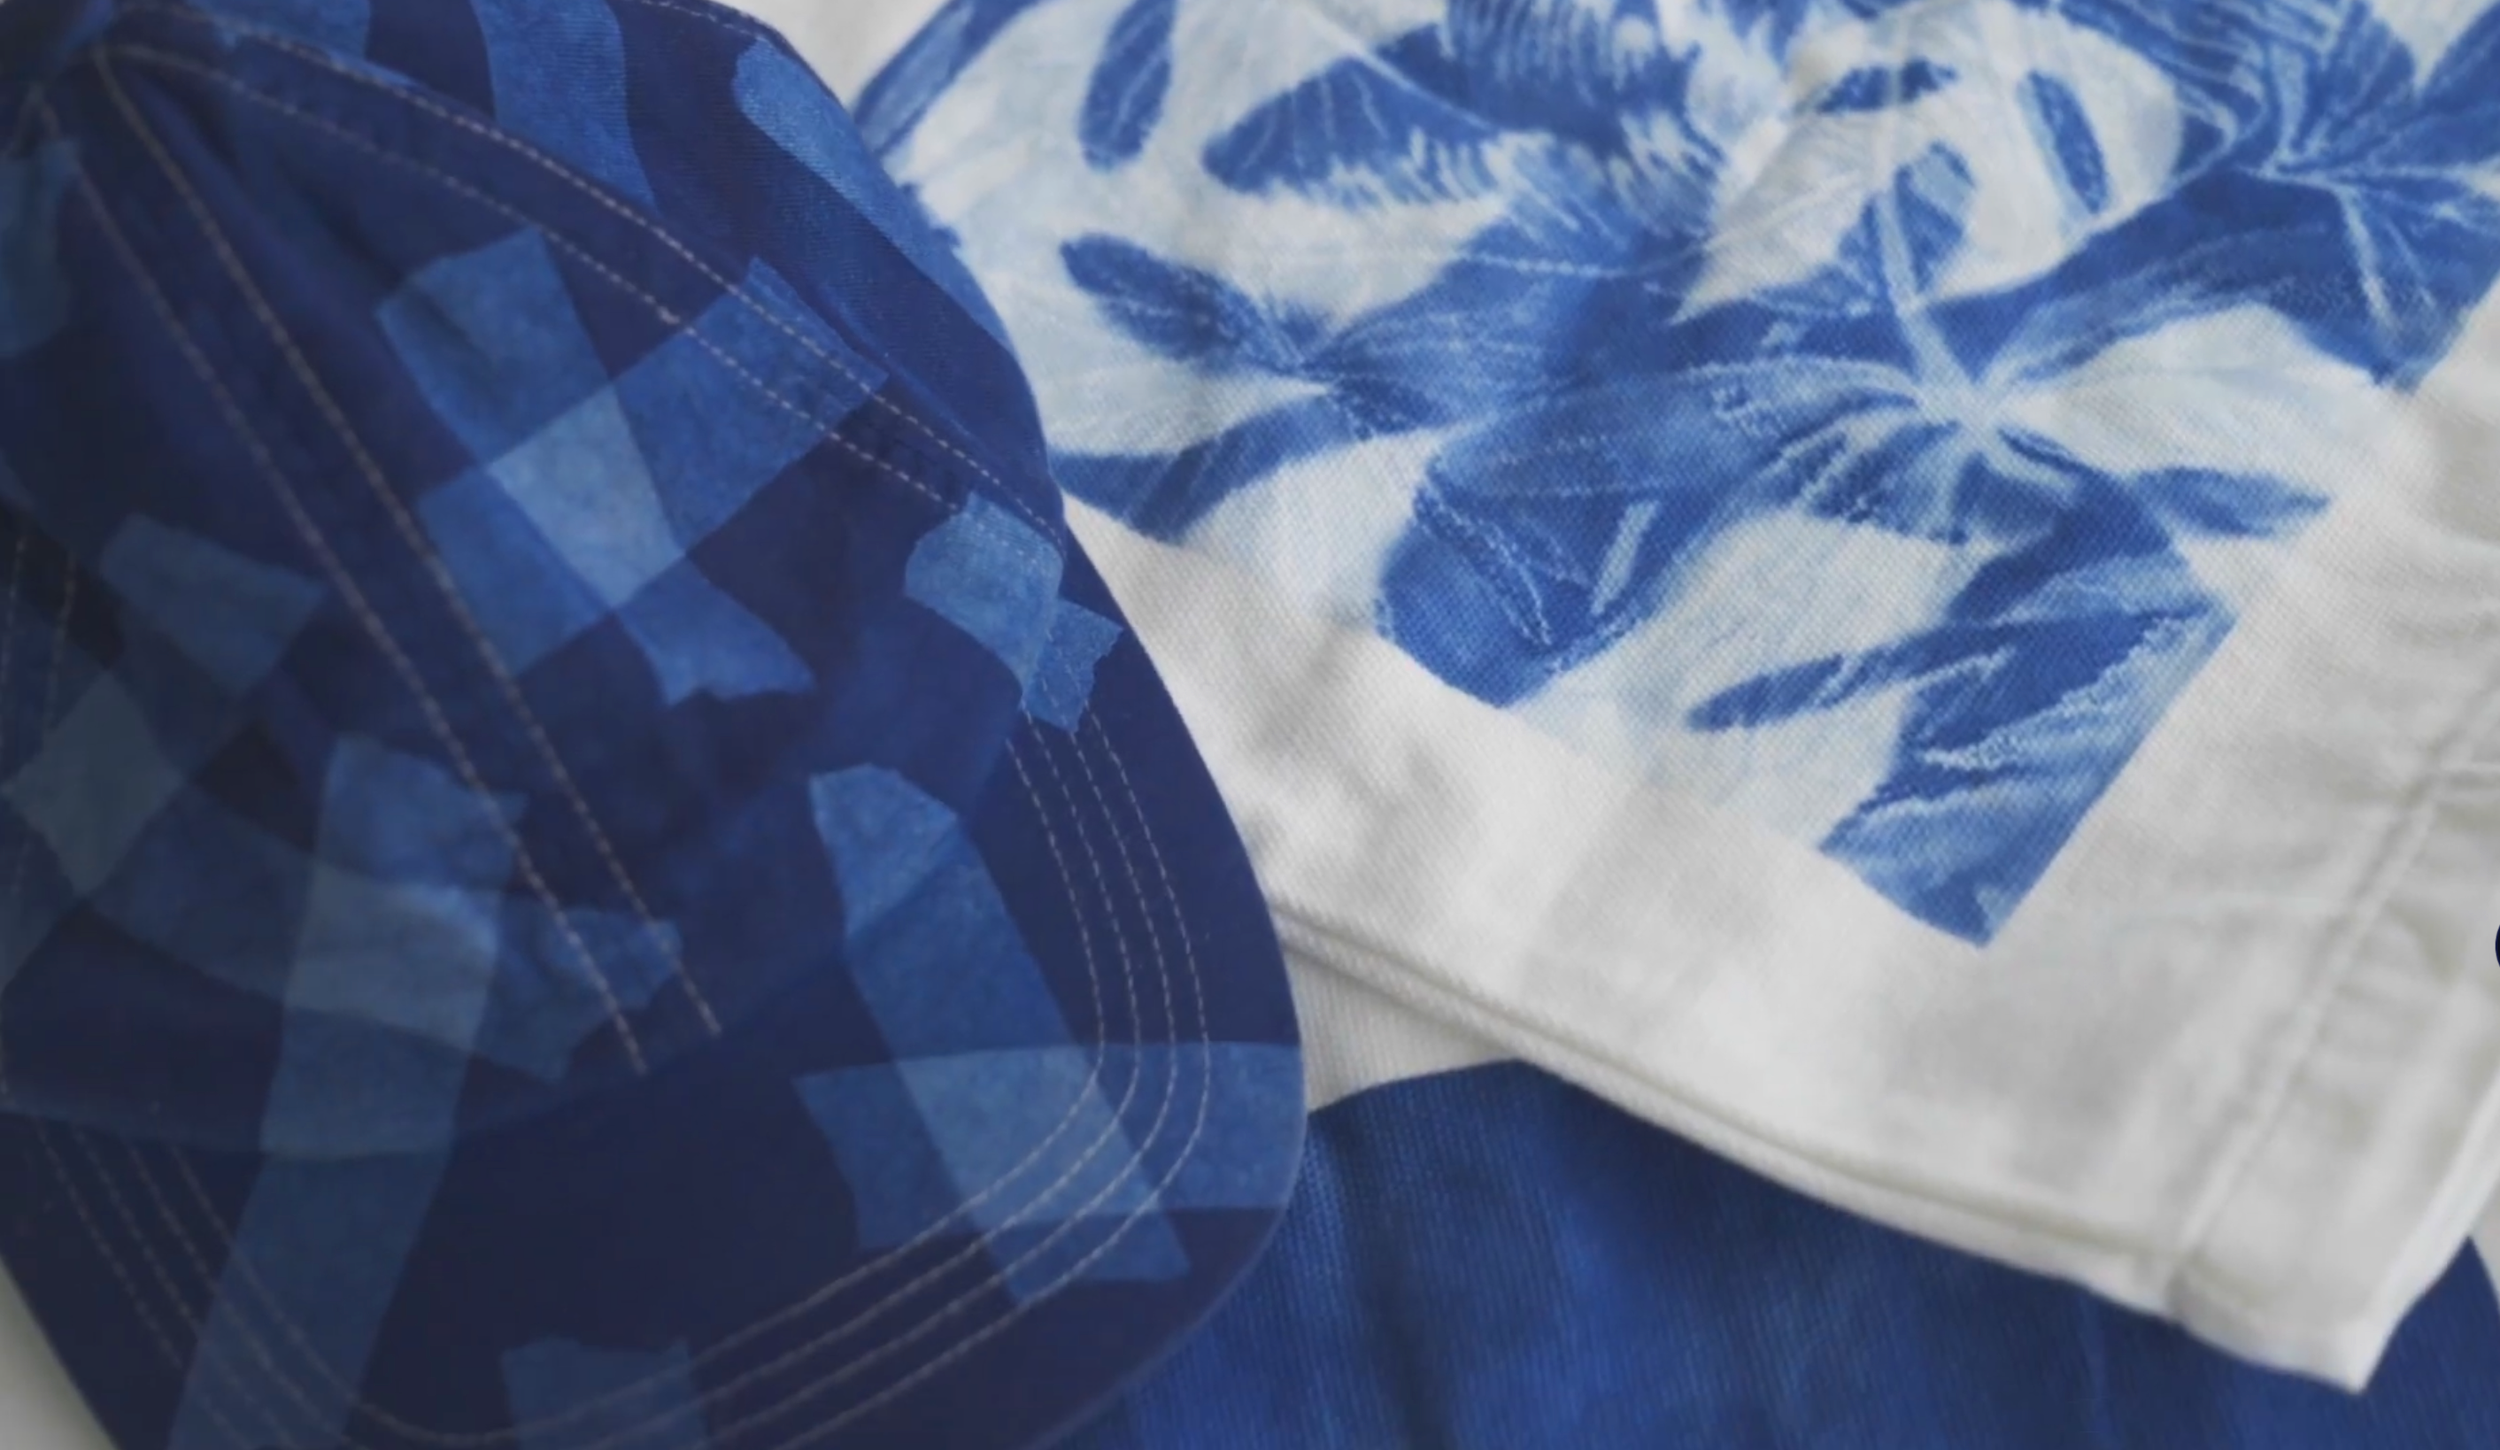
How to Make Cyanotypes on Fabric and Textiles
What is a cyanotype?
Discovered in 1842 by Sir John Hershel, the cyanotype was one of the first photographic processes ever created. Cyanotypes are unique in that they use iron, rather than silver, salts to form an image. This image, which also happens to be a vibrant blue, is born through the combination of UV light and water.
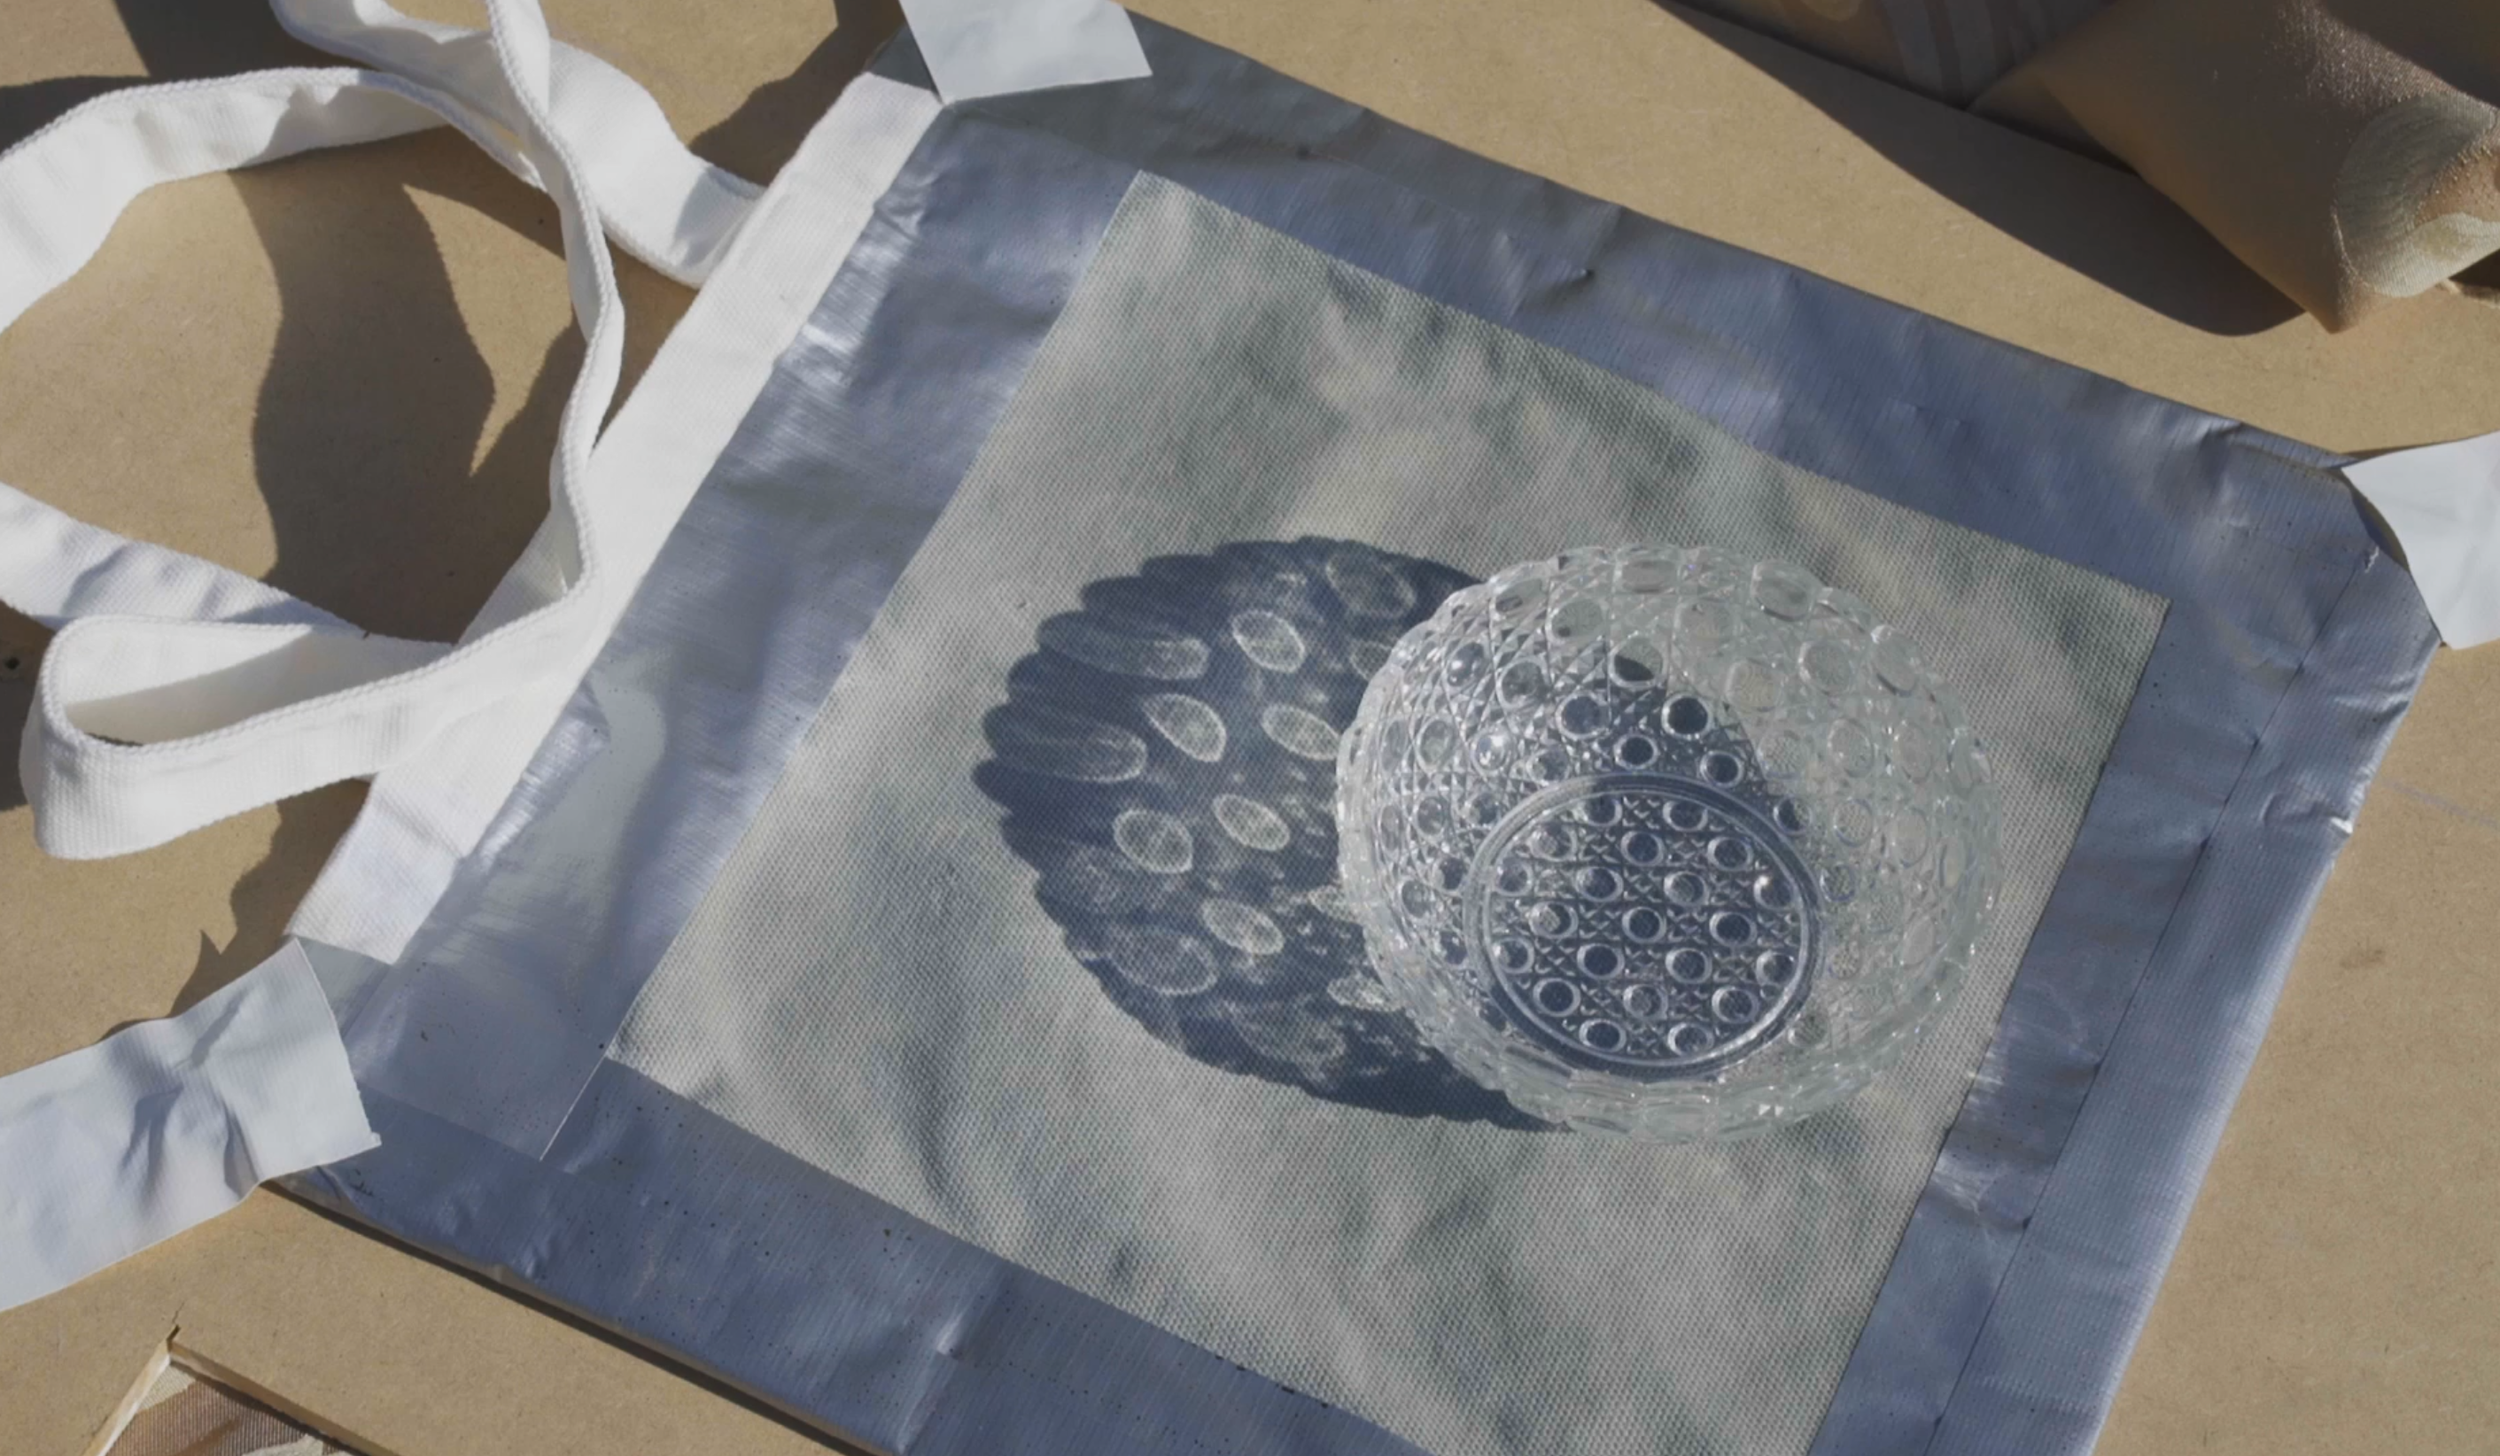
There are two traditional ways to create a cyanotype image. The first is a photogram - a generalist term where something is laid on top of the cyanotype chemistry and the image captured is that thing’s shadow or silhouette. The second technique is making a contact print from a negative transparency, which can be made from film or printed digitally.
While cyanotypes have never really held the photographic spotlight, they were popular for a time in engineering and architecture and are interestingly the basis for the term ‘blueprint’. They were also used by Anna Atkins to produce the first photobook; Photographs of British Algae: Cyanotype Impressions, which was a pivotal shift away from subjective, hand drawn scientific documentation to a more objective photographic one.
In the 21st century however, cyanotypes are having a bit of a comeback. Inexpensive, easy to make and with no need for a darkroom, the cyanotype is the perfect alternative photographic process to get into at home.
Materials needed for cyanotypes:
There are a few things you’ll need to get in order to make cyanotype prints on fabric:
Cyanotype solution (you can buy this premade, or get it and mix it yourself following the instructions below)
A fabric with natural fibres (e.g. cotton, linen, silk, etc)
A spray bottle
Some black tape
A backing board (such as 5-10mm MDF)
A foam insert to match the size of your design (this isn’t essential, but helps maintain good contact between the objects and the material)
Heavy glass to cover your design (I use an 8mm sheet that I got from a glass cutter)
It’s also important to look out for yourself, so I’d recommend the following safety supplies too:
Gloves
Safety Glasses
Respirator (for spraying and mixing chemistry)
Apron
How to mix cyanotype chemistry
One of the great things about cyanotypes is it’s really easy to mix the chemistry yourself, and doing so makes the process quite affordable! You’ll need a few things to get going:
A set of scales that can measure grams
3 x beakers and 3 x chemistry containers
A chemical stirrer
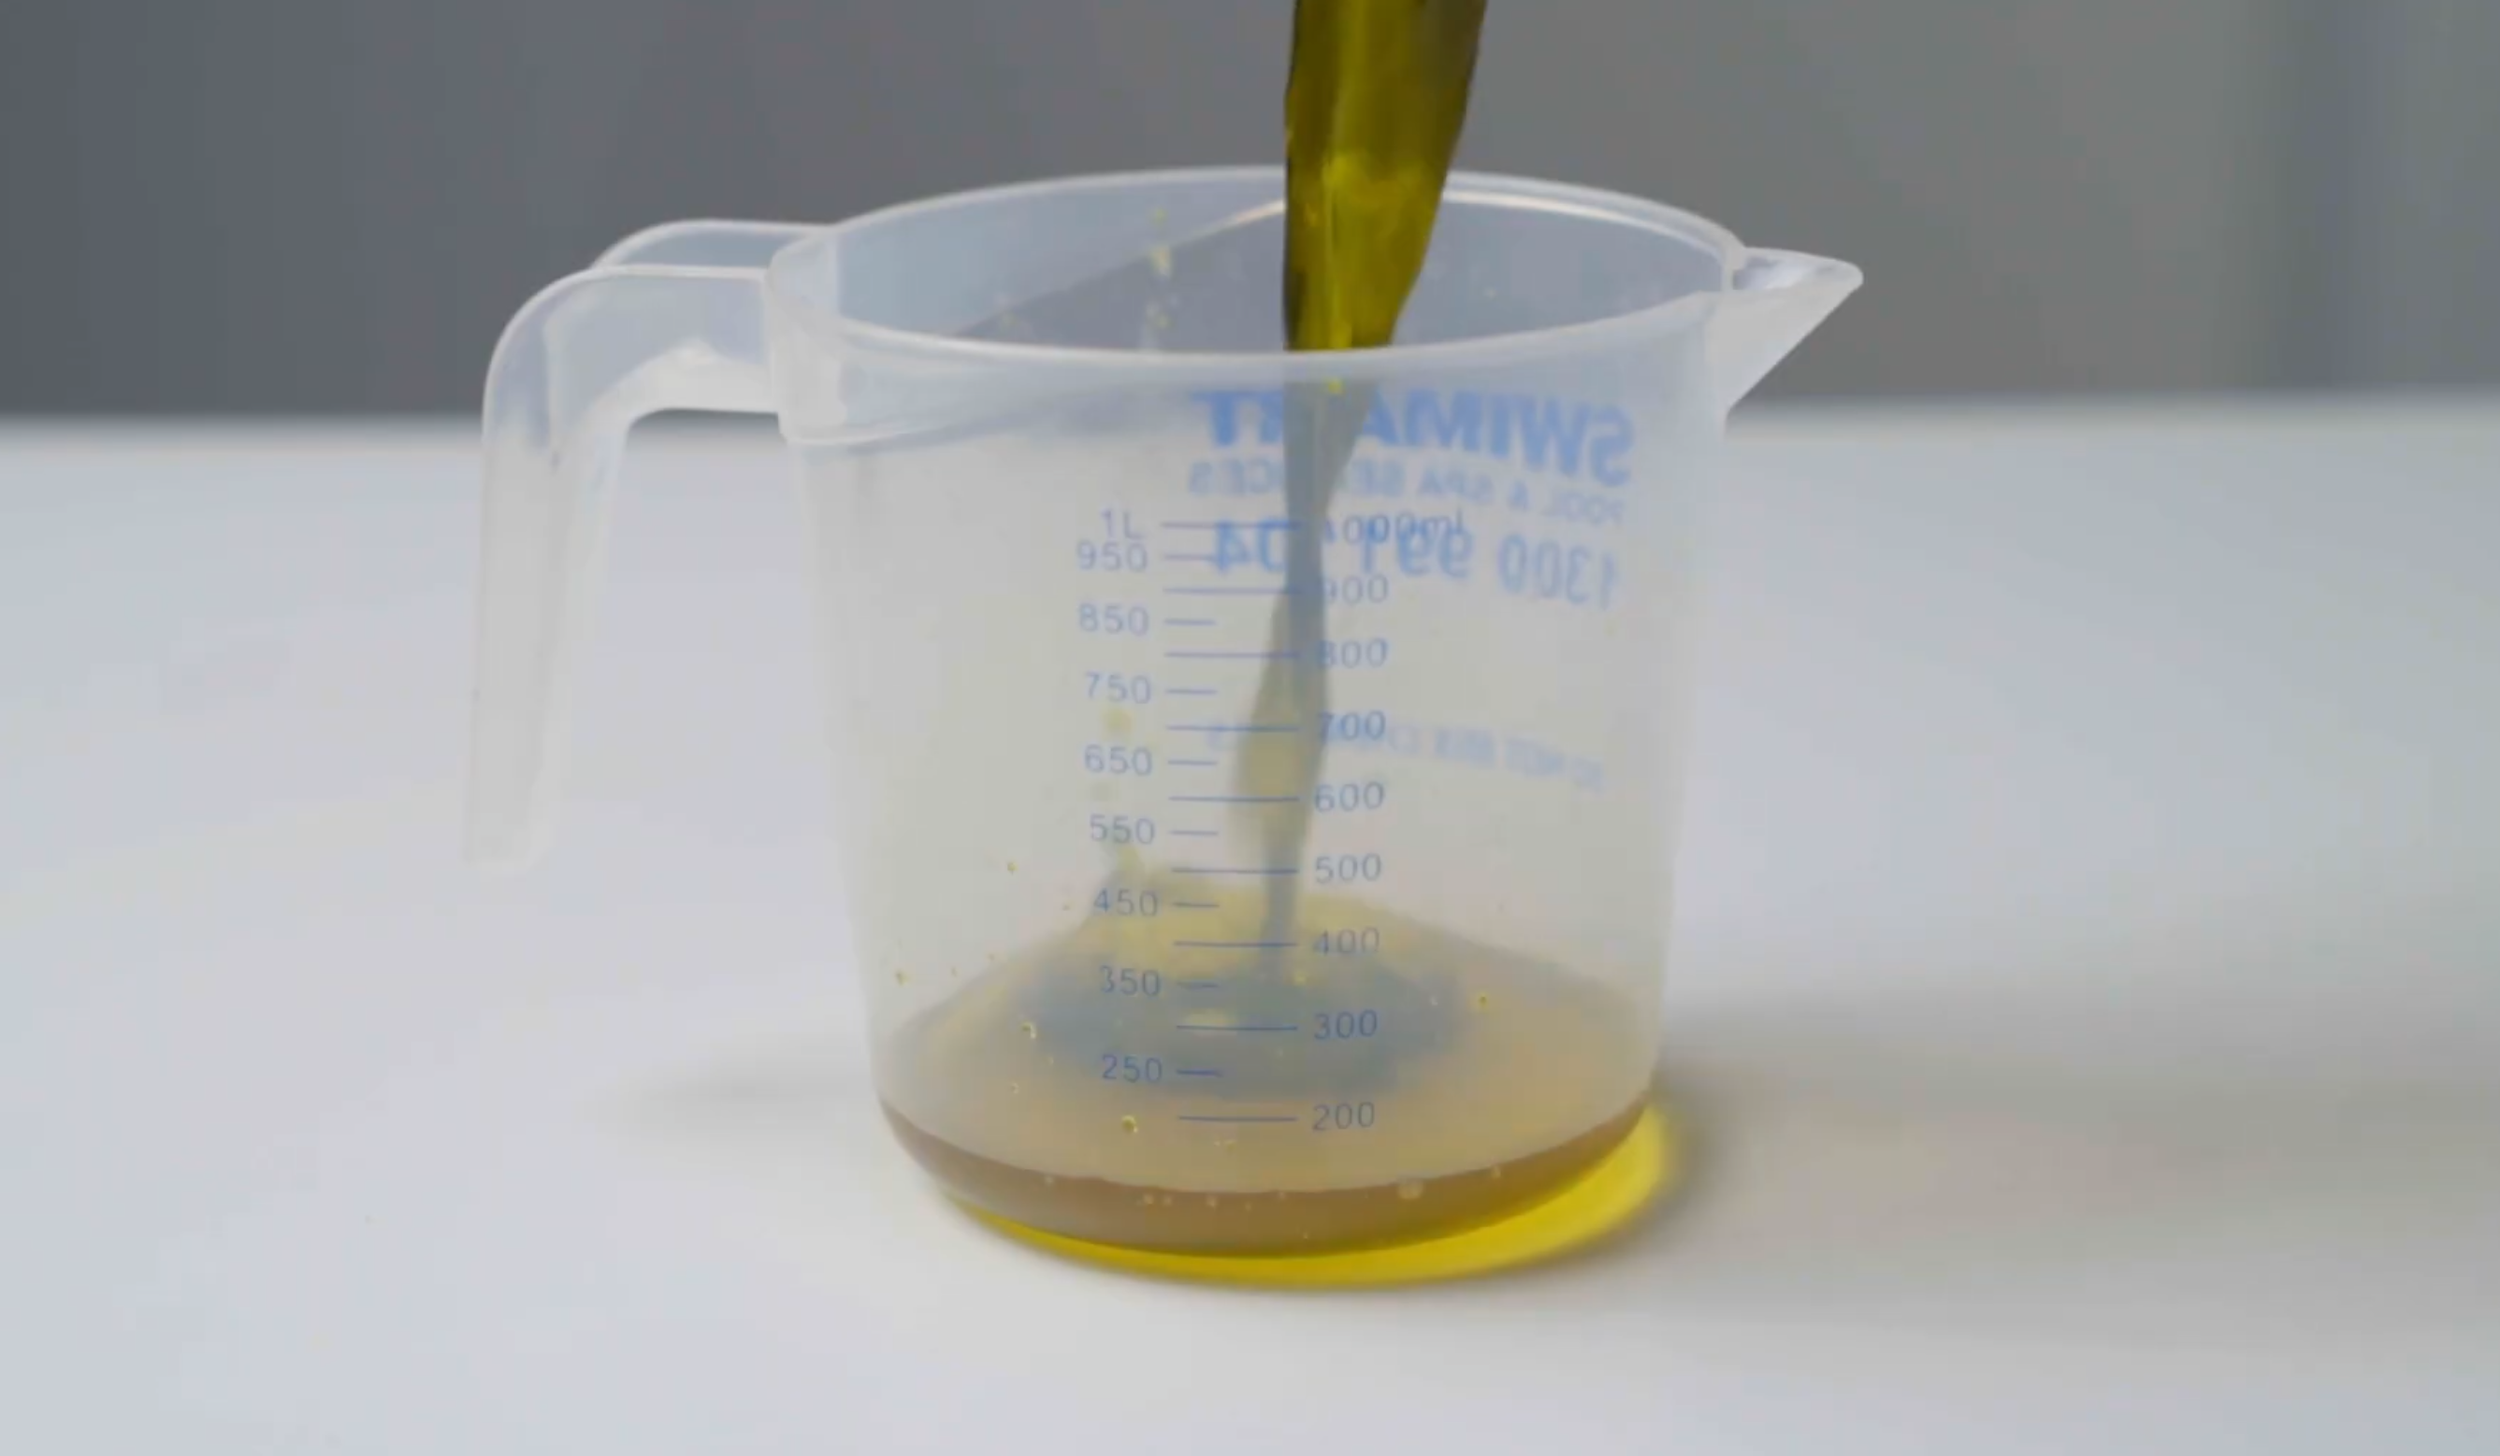
Mark your beakers and containers so that they are for Part A, Part B and Part A + B, and use them accordingly. The raw chemistry is pretty easy to source, have a look online for what’s available in your area. The classic recipe invented by Herschel still works well today, and is made of two parts:
Part A - 25 grams of Ferric Ammonium Citrate + distilled water to make 100ml solution
Part B - 10g Potassium Ferricyanide + distilled water to make 100ml solution
These two parts are not light sensitive by themselves, and for longer shelf life are best stored apart. When you are ready to use them, mix up the amount that you need at a 1:1 ratio about 24hrs before you coat your material. Make sure that you mix in a well ventilated area and wear safety equipment.
How to prepare the cyanotype
Step 1: Coating the fabric
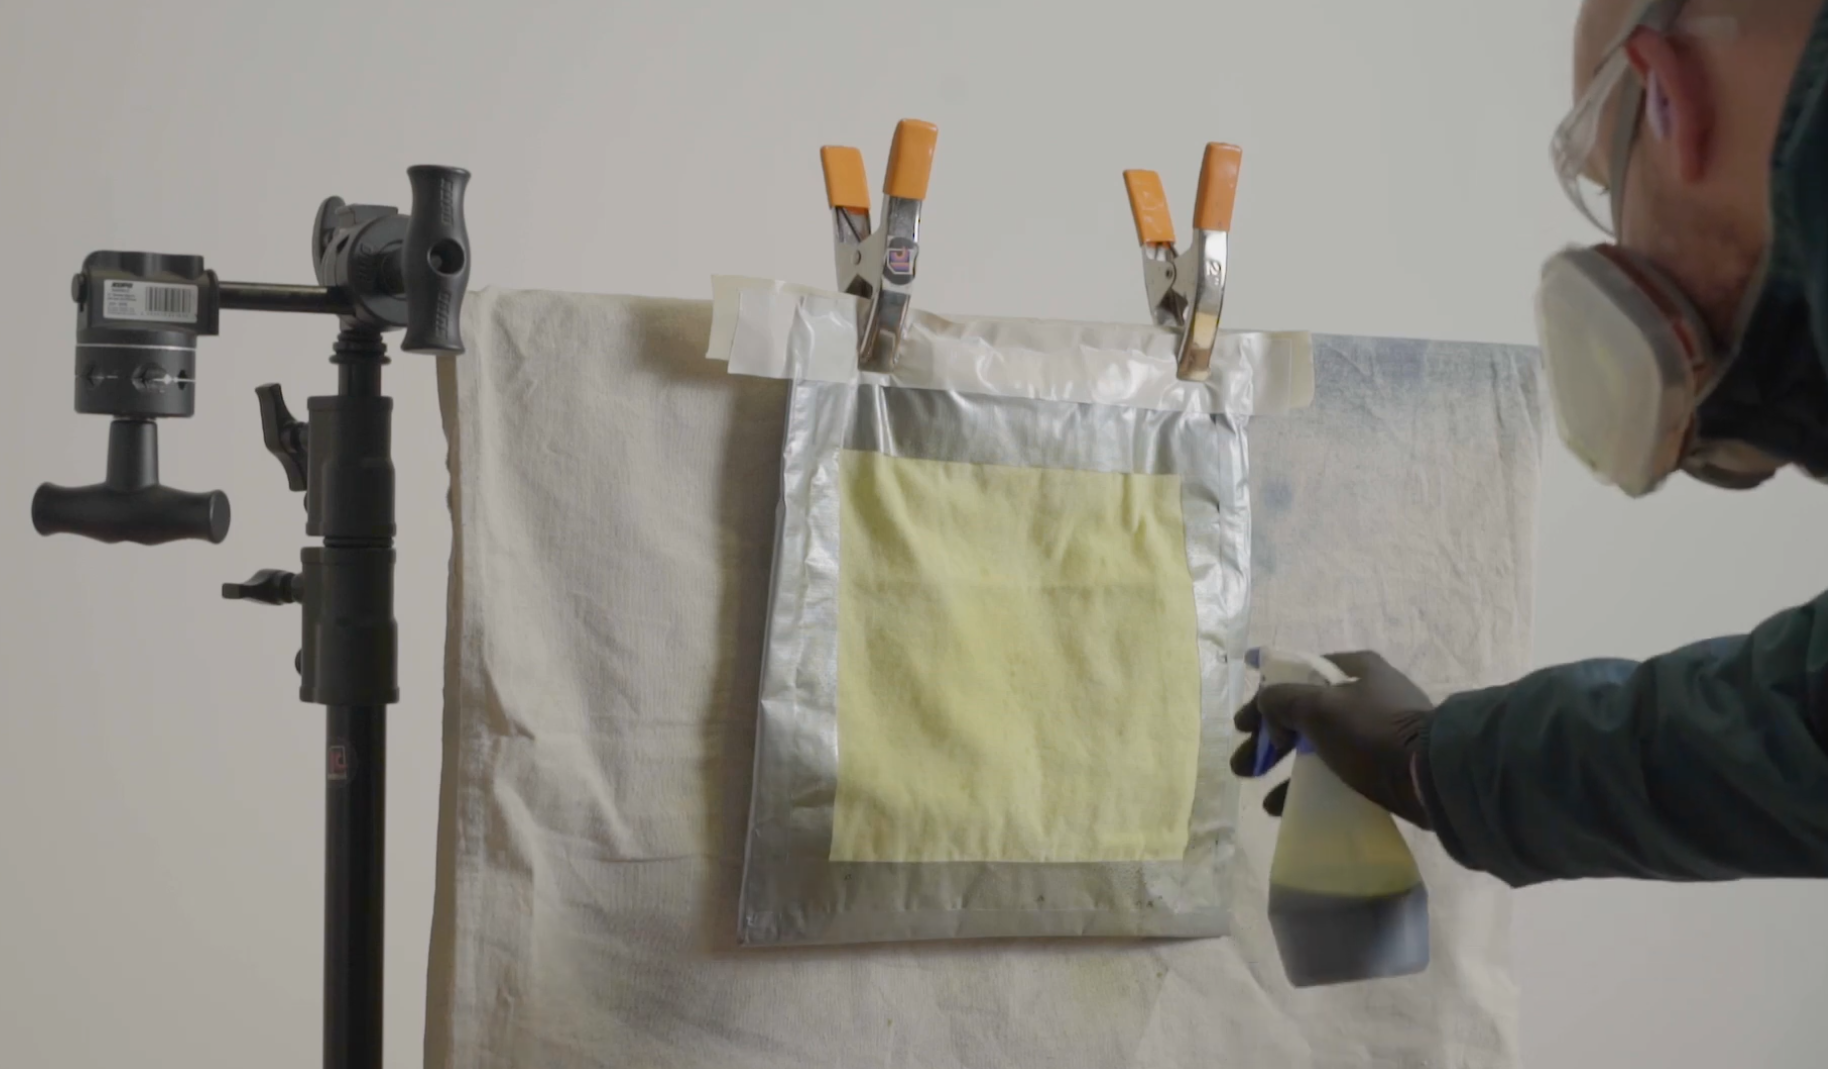
Before you jump into coating your fabric, you want to get your workstation ready. First pop your mixed chemistry into the spray bottle. Note; this will make the solution light sensitive, so you’ll need to choose a dim space to do this in, closing any blinds or curtains to reduce the UV light.
With that in mind, make sure you’ve got your safety gear on and that you have a system in place to control any overspray, as this stuff will stain your surroundings if it gets away from you. Spray the cyanotype solution in slow, controlled bursts along the material, coming at the fabric from different angles. Use as little chemistry as possible, but make sure you’ve got a nice even coating.
Anywhere on the fabric you coat with solution will become light sensitive, so think about which parts you want to be blue in the final design. Do you want the hole bag coated, or just certain parts. Don’t be afraid to play around with other methods of applying the chemistry, such as with a paintbrush.
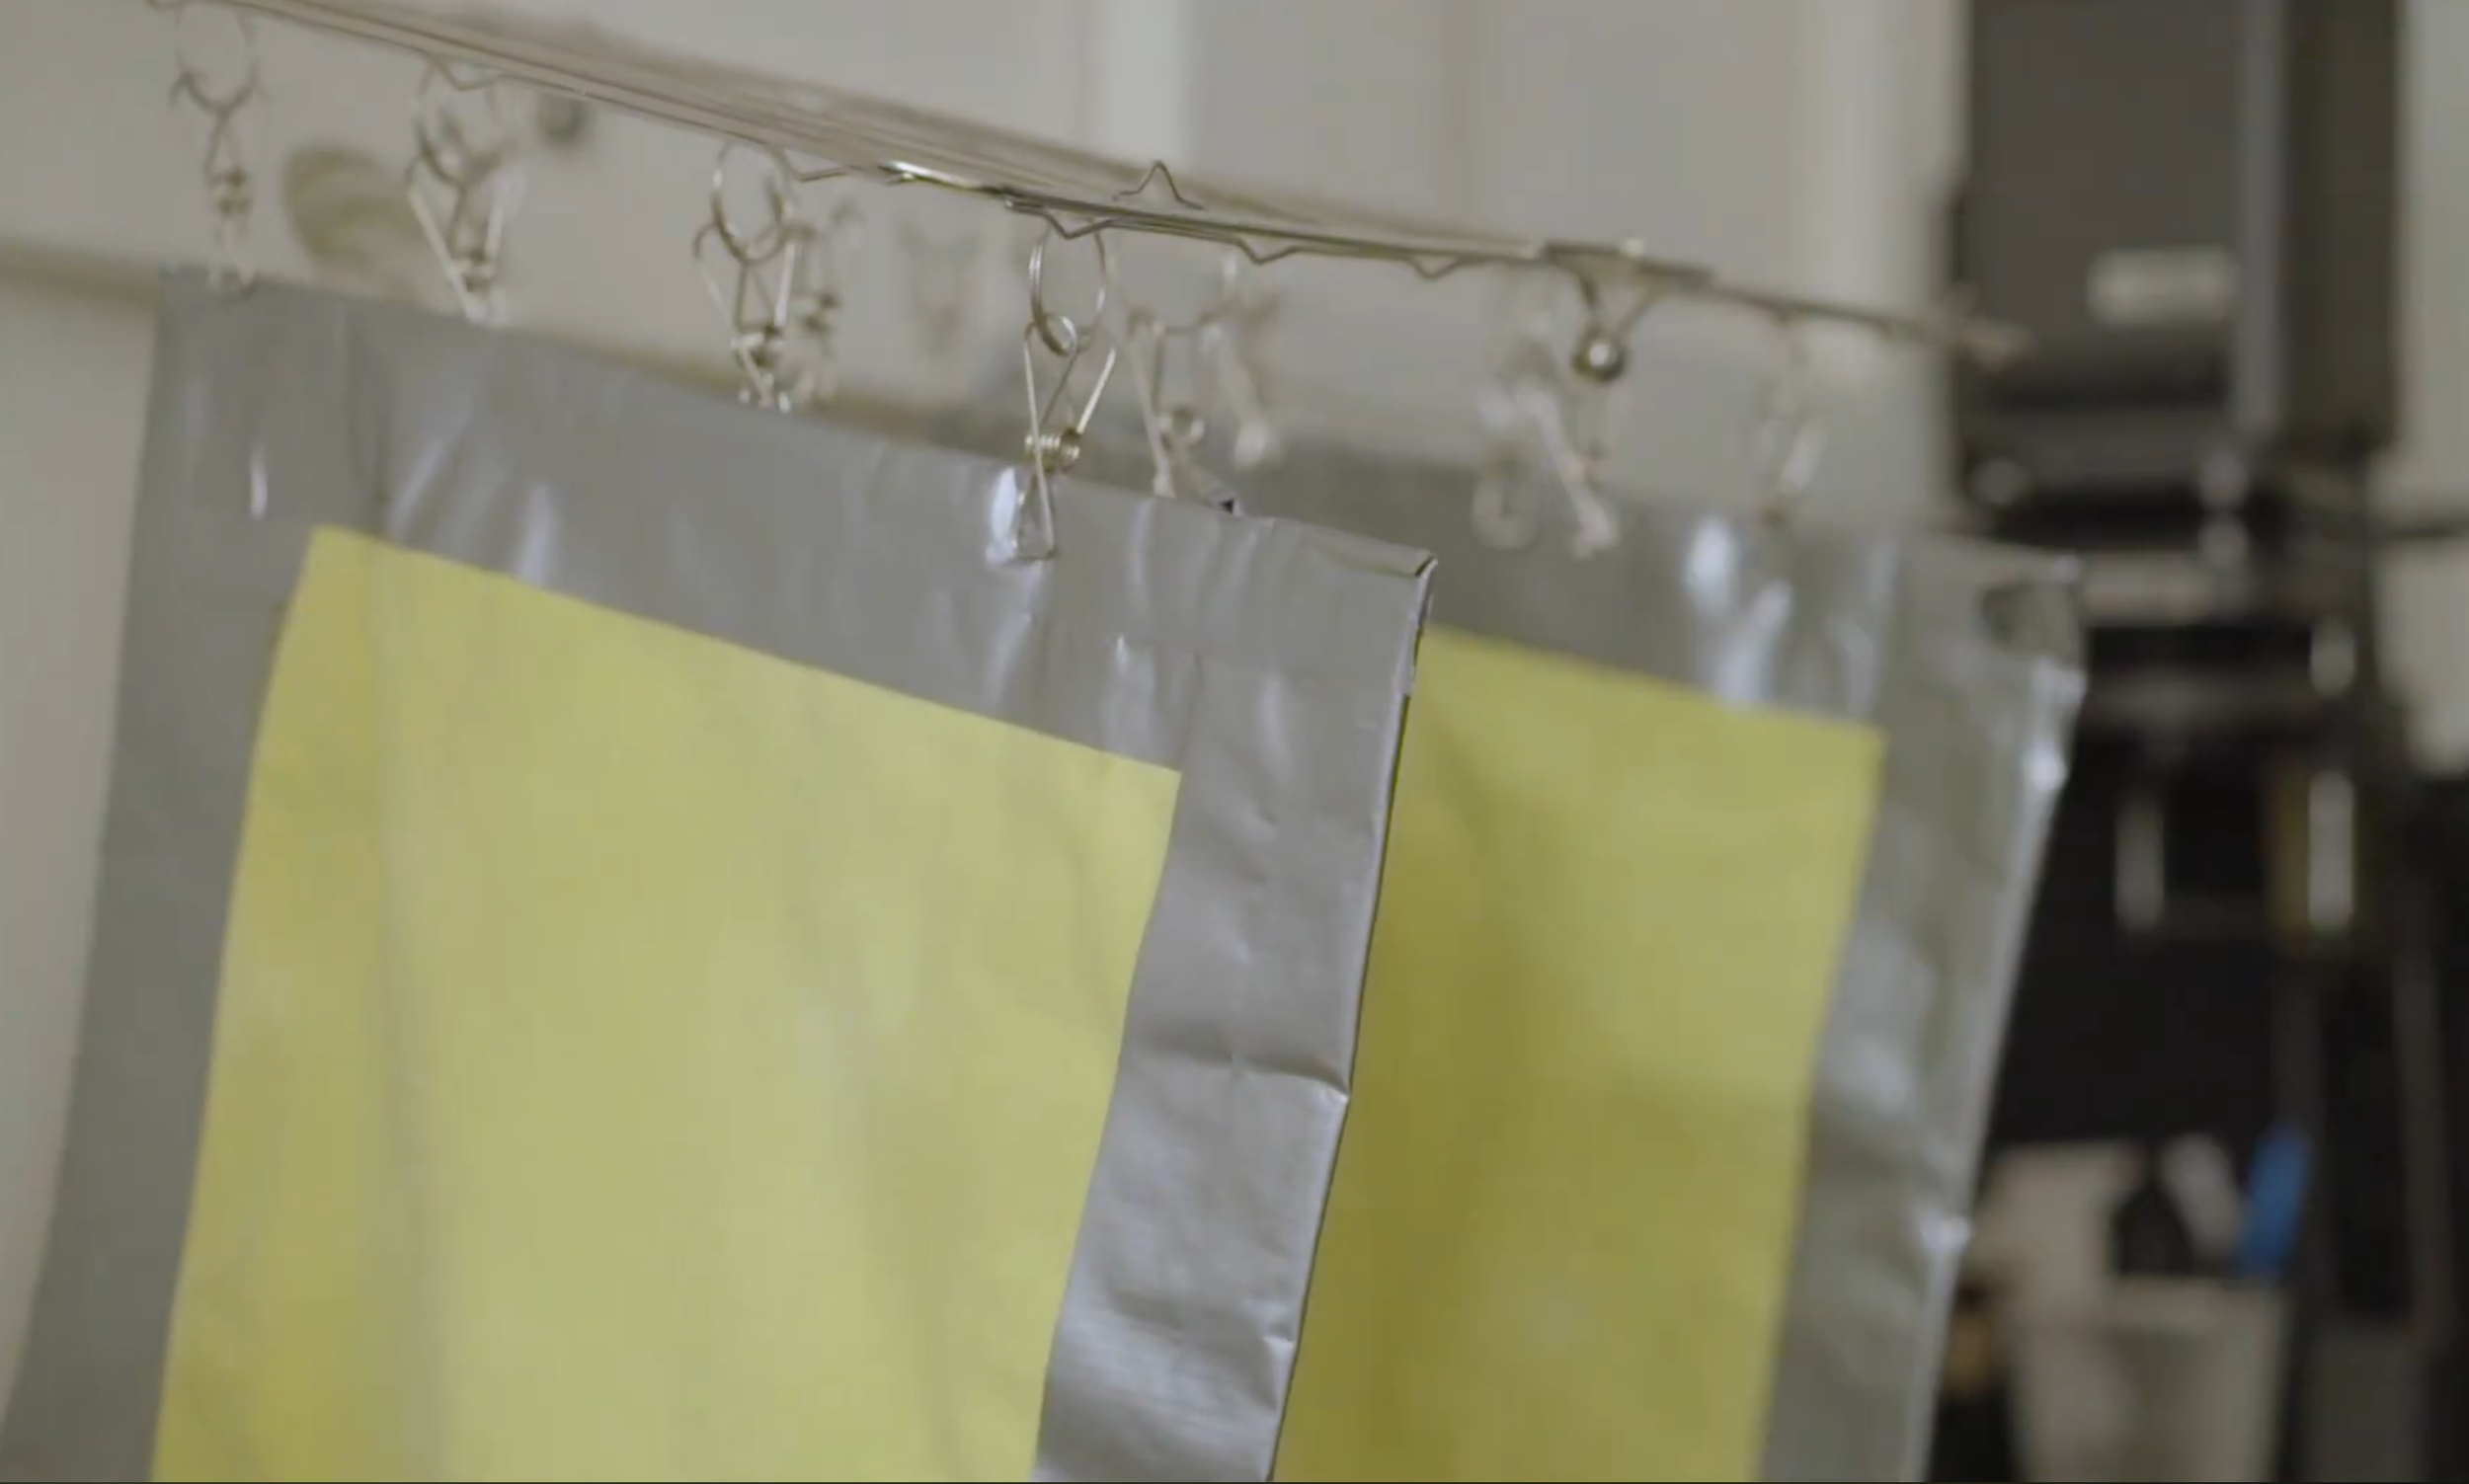
Step 2: Drying the fabric
Once the fabric is coated, it needs to be bone dry before it can be used. Depending on how much solution you’ve used, this may take a while, and I normally leave my bags in a dark room for a couple of hours with the fan running, or leave them overnight.
If you are the impatient type, you can speed up this process with a hair dryer. Recommended settings are a low heat in a dark room, and to play things safe, keep your respirator on while doing so.
Once everything is dry you can pop in your foam insert and put the fabric on the backing board, ready to create your design.
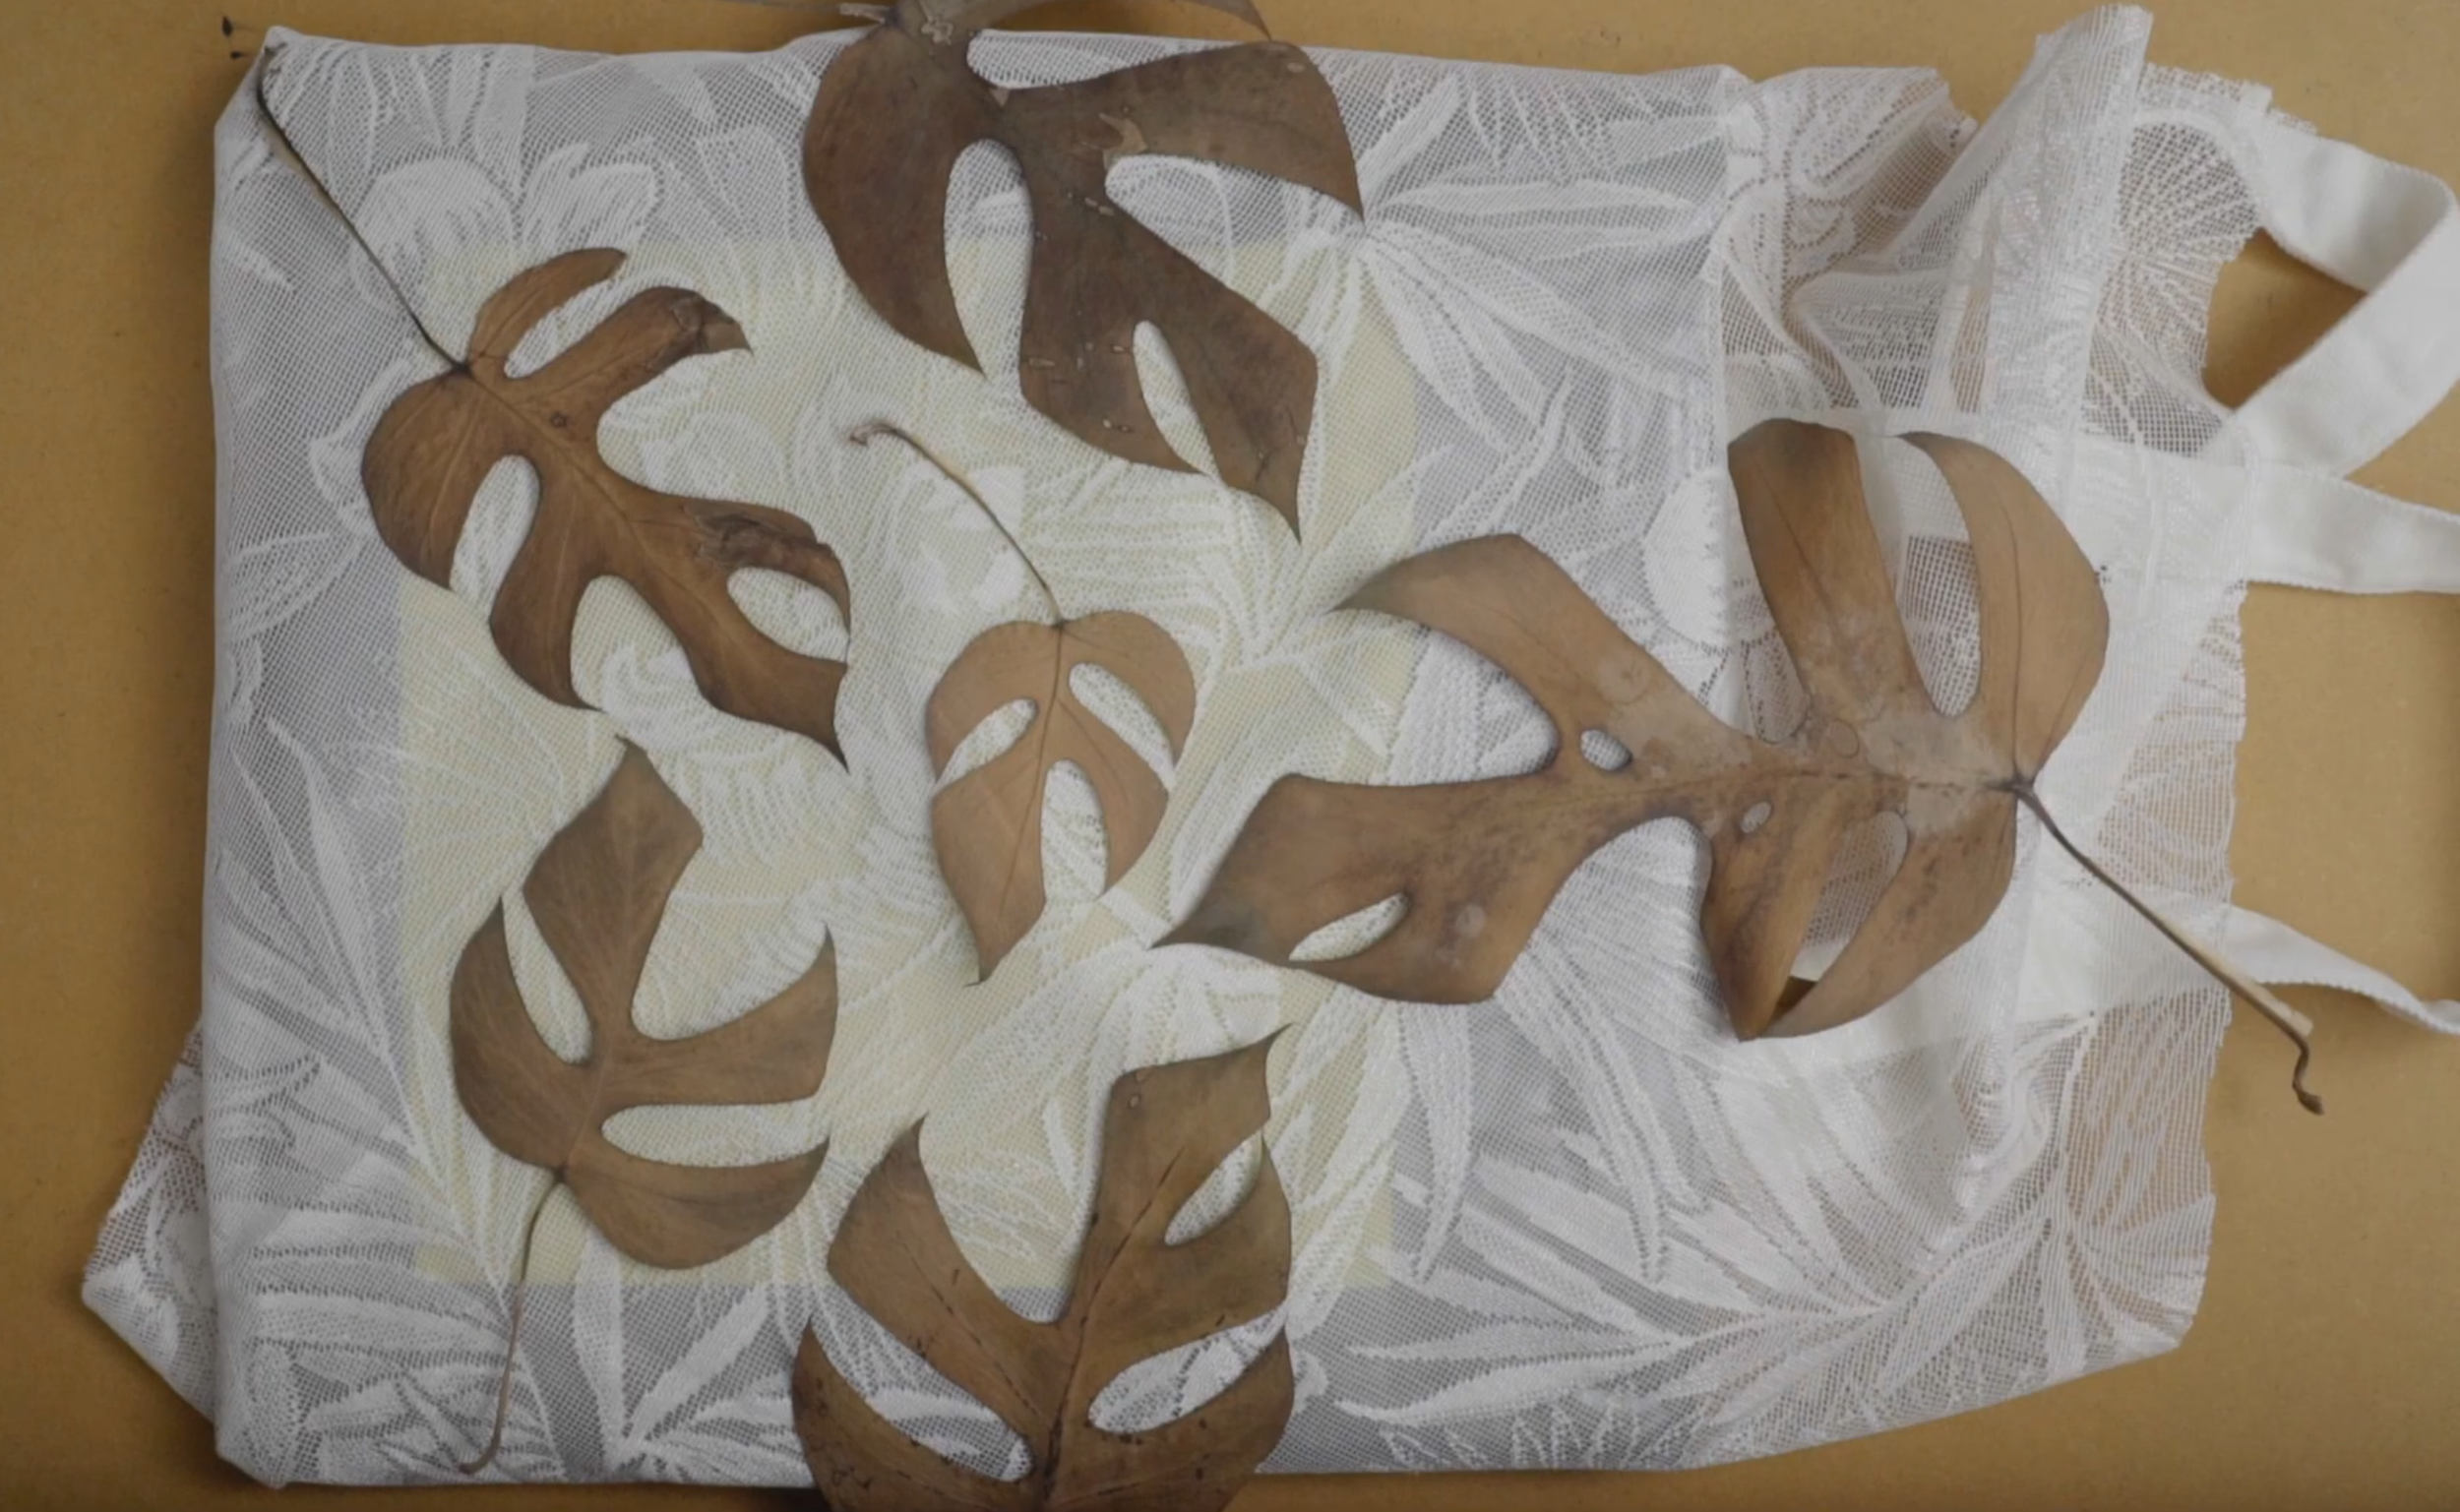
Step 3: Preparing the design
Not all things make for good photograms, so what you choose to use for your design can make or break the image.
Typically, things that can be squished flat and have interesting shapes work best - think leaves, flowers, feathers or lace. If you are using natural materials it is best to dry them first so that they don’t mess with your coated chemistry, though I often don’t abide by this rule.
You can also use tape or black cardboard to block sections from exposing - called masking. This technique can be used to create borders or segment designs. You can even use black pen on a transparency to create your own drawings! This is where you get to be creative, so see what designs you can come up with!
Remember, at this stage, your bag is UV light sensitive. Arrange your design in a dim space, and once you are happy with things place the glass on top to secure it and get ready for your exposure.
How to expose the cyanotype
A question I get asked a lot is ‘how long should I expose my cyanotype for?’, and it’s a bit like asking how long is a piece of string. There are a number of factors that come into play when exposing a cyanotype, including the material you’ve used, how much solution is on it and the weather where you live, to name a few. For that reason, take all recommendations with a grain of salt and do your own testing.
The best way to test your exposure is by using test strips. This involves coating some spare material, and then doing a range of exposures on it to see when you’ve reached the desired level of blue. There are two tests you can do, and I normally do them both in this order:
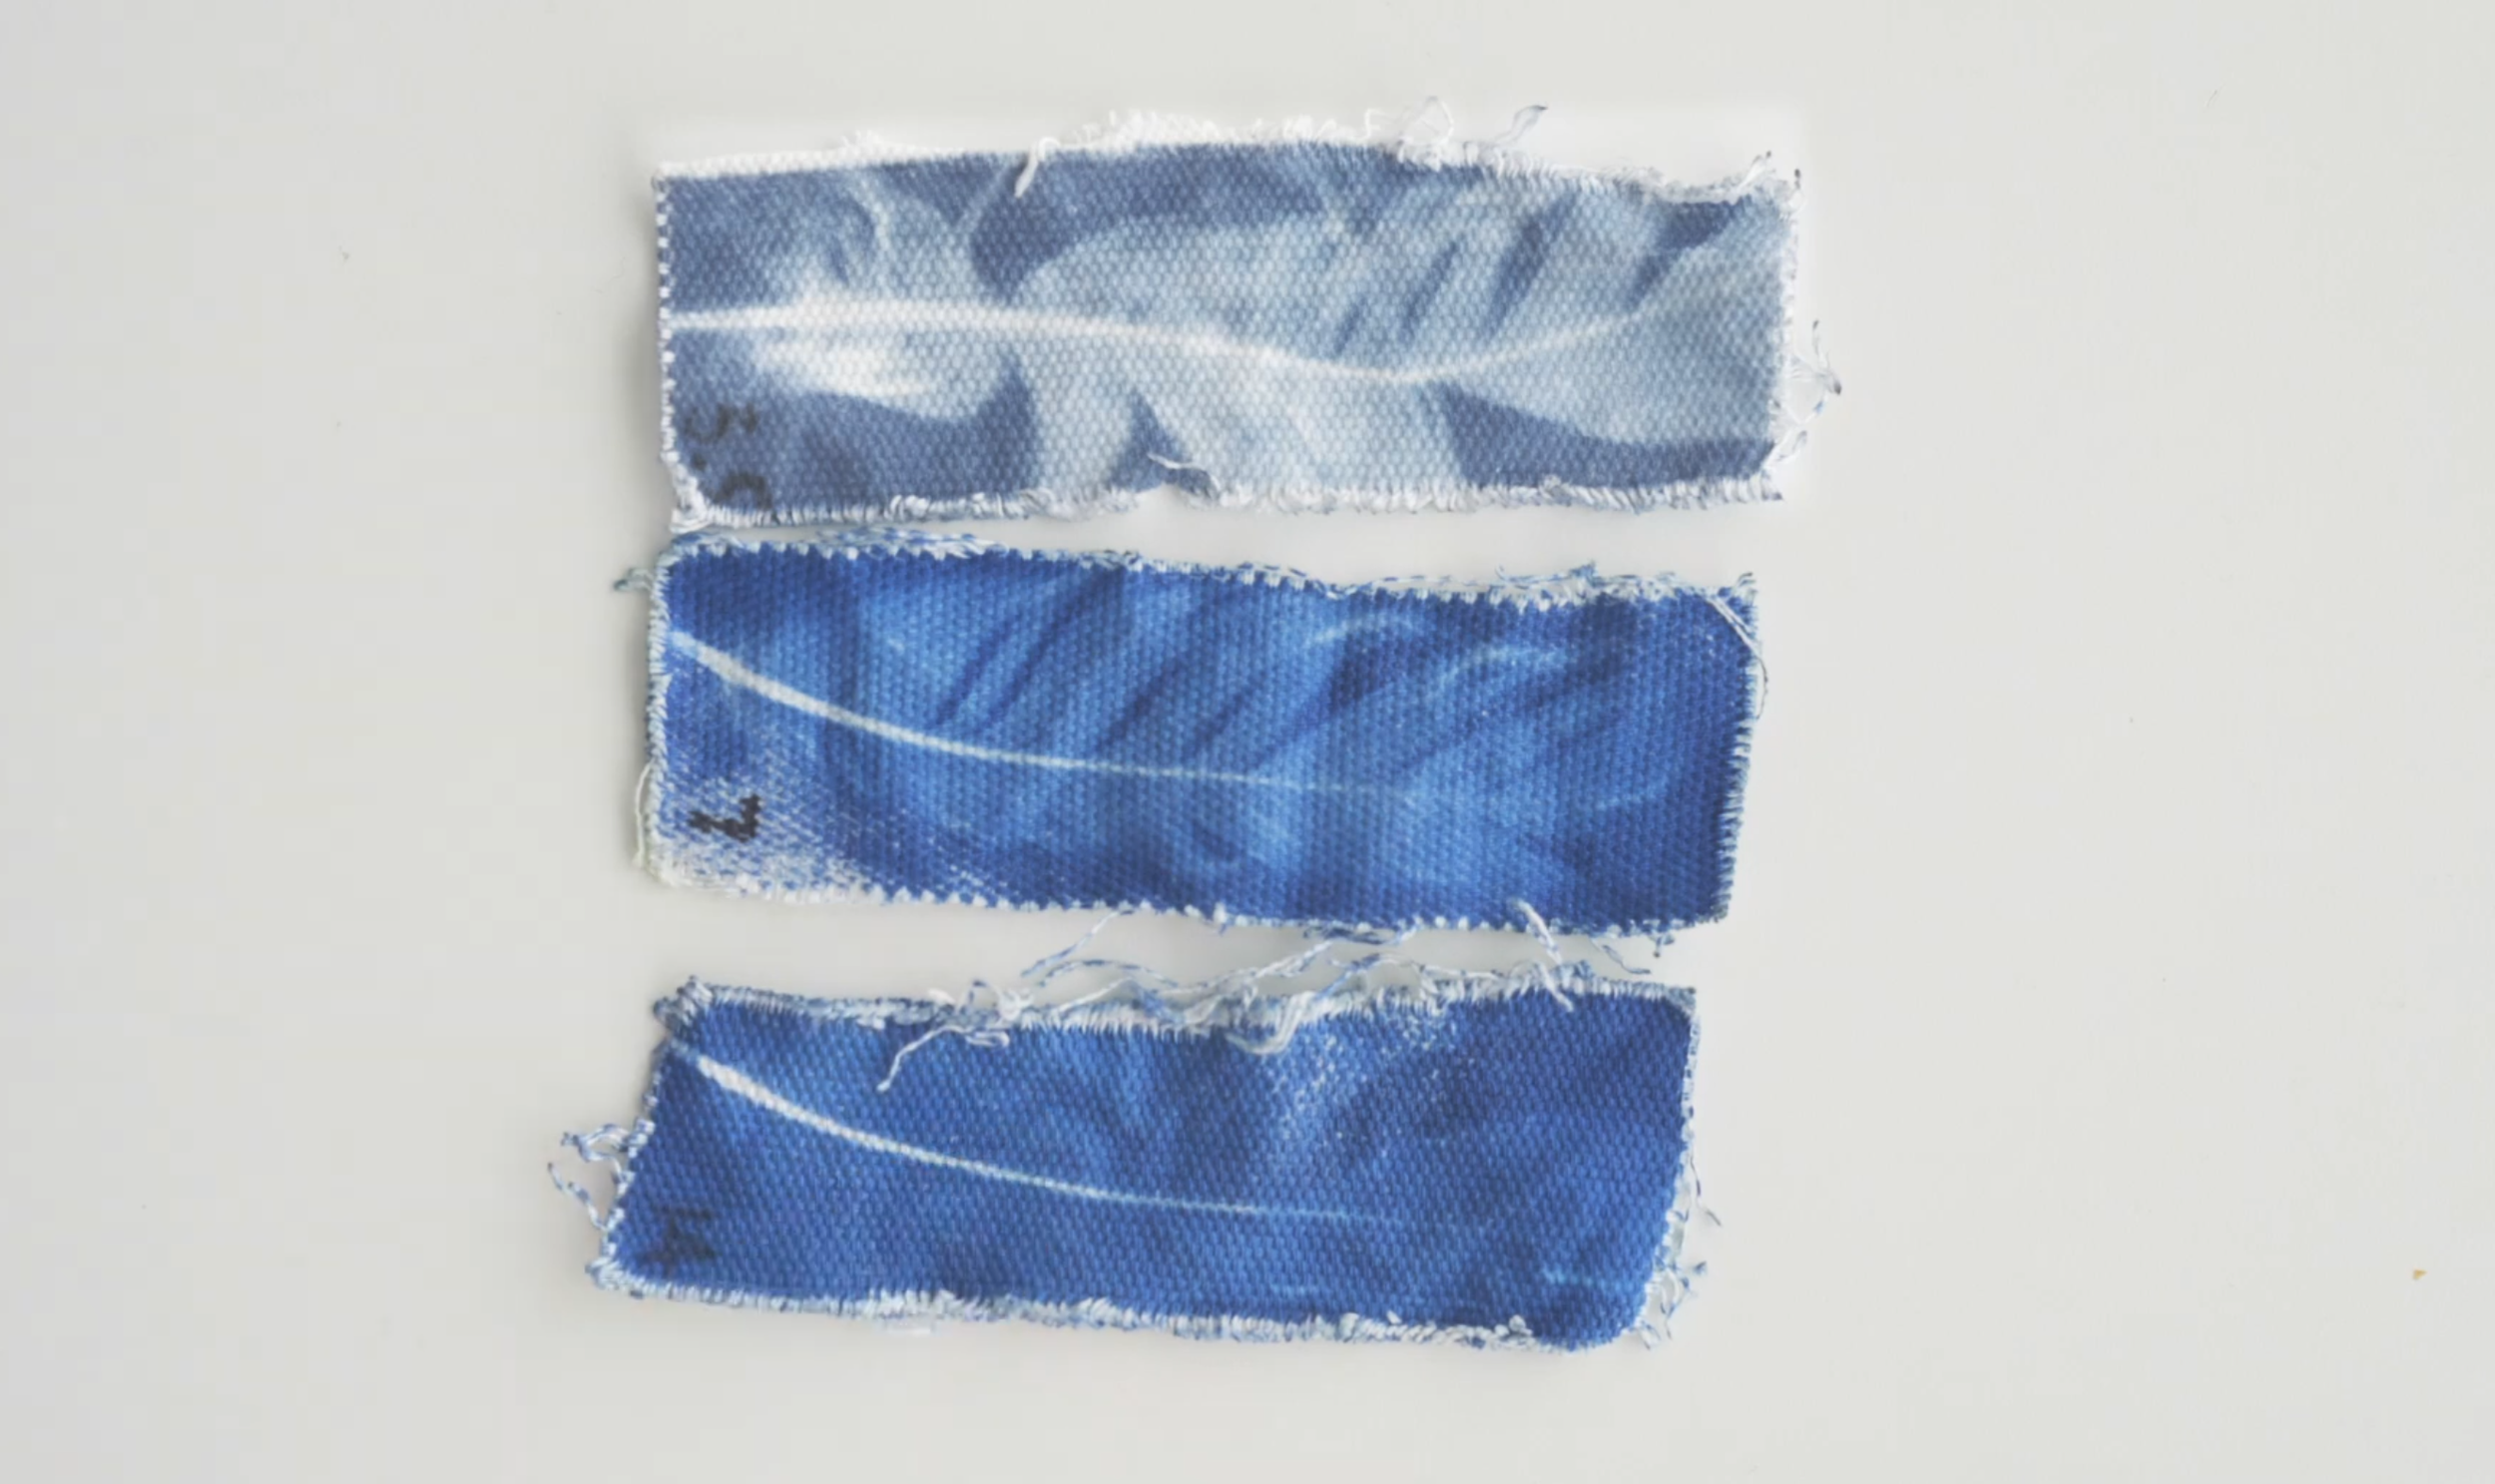
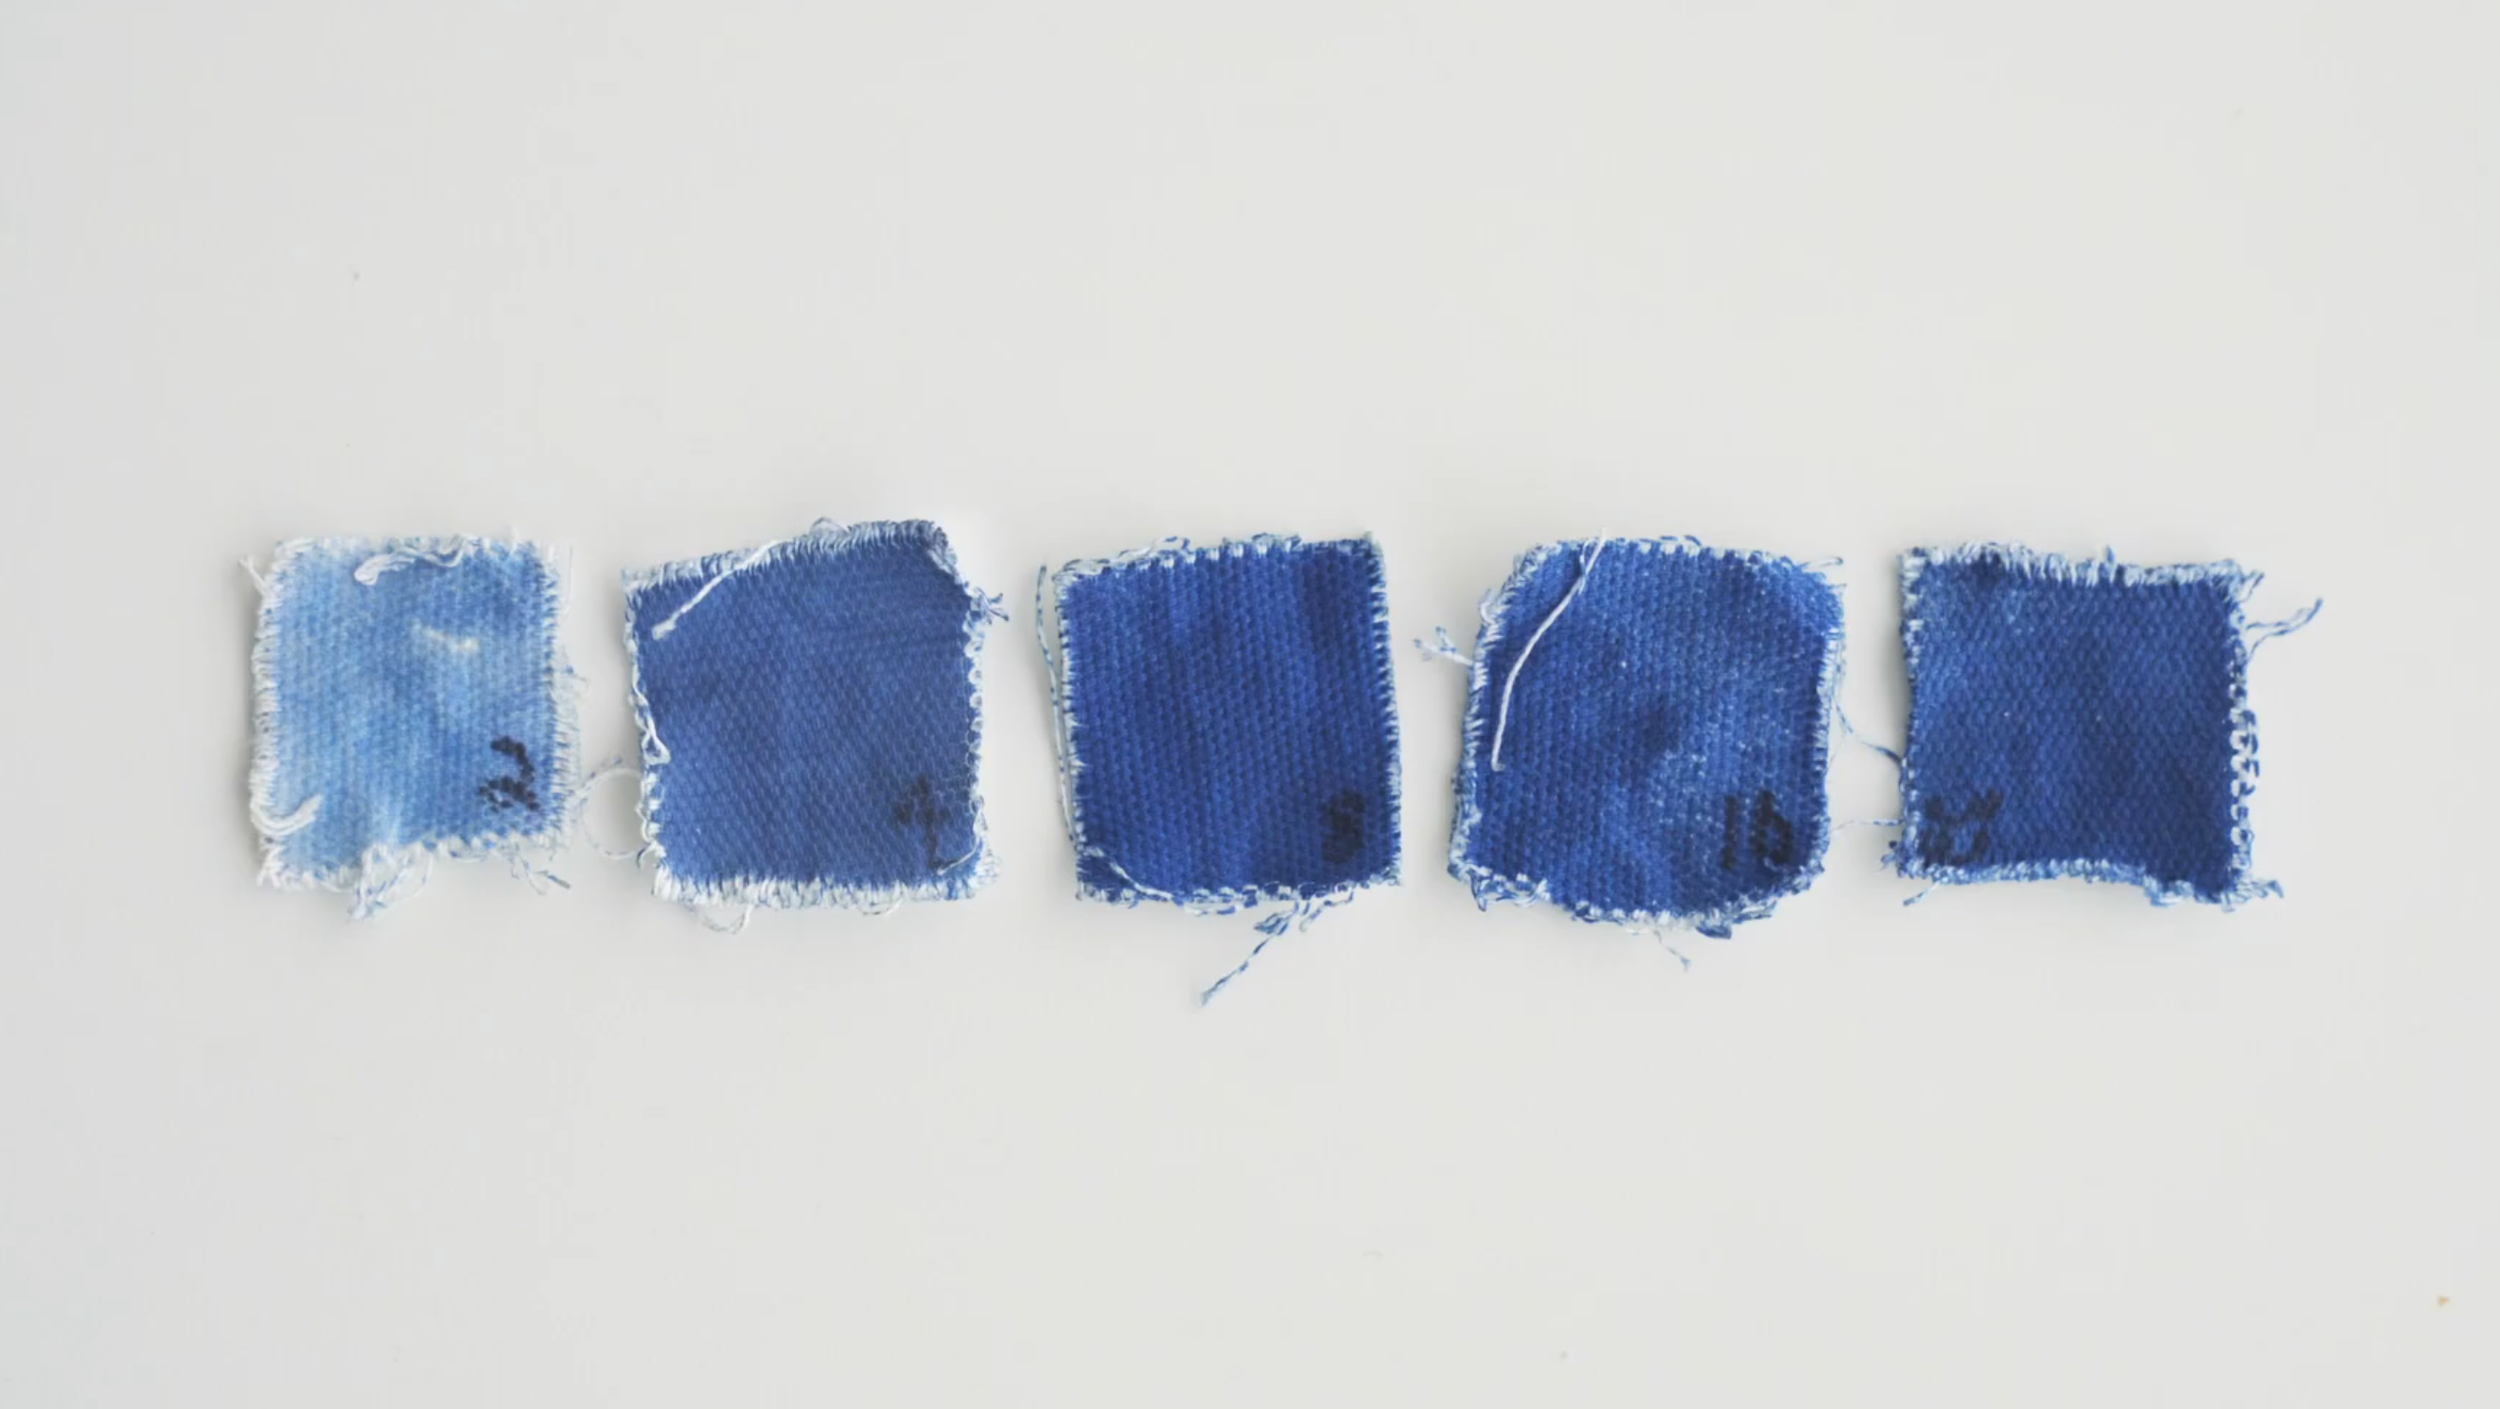
Test when you reach ‘maximum blue’ by exposing several squares of material - doubling the exposure time between each square (2 minutes, 4 minutes, 8 minutes, etc). Wash these squares after exposing, and when the colour stops getting more intense between steps, you’ve reached the ‘maximum blue’. It can be useful to use a hydrogen peroxide bath (see the washing section below).
Lay your design over the top of some coated scrap material and using a piece of black card, cover sections of it at different time intervals to create a series of exposure ‘steps’. Choose times centred around the exposure you got for the ‘maximum blue’ value above. For example, if your maximum blue was reached at 16 minutes, do exposures for 12, 14, 16, 18 and 20.
If you are using a UV lightbox you only need to do these tests once, and then you’ll have a pretty good idea as to what your exposures should be. If using the sun to expose, then the exposure tests should be redone when the lighting conditions change. It can be a real pain having to go through these steps when you are keen to just get creating, but cyanotypes can be a fickle process, and going through these initial steps can avoid heartbreak down the track.
Step 4: Exposing the cyanotype
Expose your cyanotype for the time you’ve calculated using the steps above, and I find even after doing all that preparation, it’s good to expect the first exposure to not come out perfectly (then you can be happily surprised if it does!). For my lightbox, I use exposure times of around 7-14 minutes.
The idea behind exposure is easy - put the material under UV light and it will begin to react (something you’ll be able to see happening in real time). The chemistry will change from green, to blue, to a kind of blue-bronze-grey, and with experience you’ll know when something is done from how it looks during it’s exposure.

It’s best to work on one print at a time, so even if the exposure doesn’t work, go through the entire process before making any adjustments. Regardless of outcome, it’s a good idea to take notes of things like how long you exposed for, what kind of wash you used, and what the lighting conditions were like so you can make adjustments on the next one.
If you are exposing under sunlight, cover the cyanotype while you move it outside, and then cover it back up once the exposure is complete to stop any additional light from getting in.
How to wash the cyanotype
Step 5: Washing the cyanotype
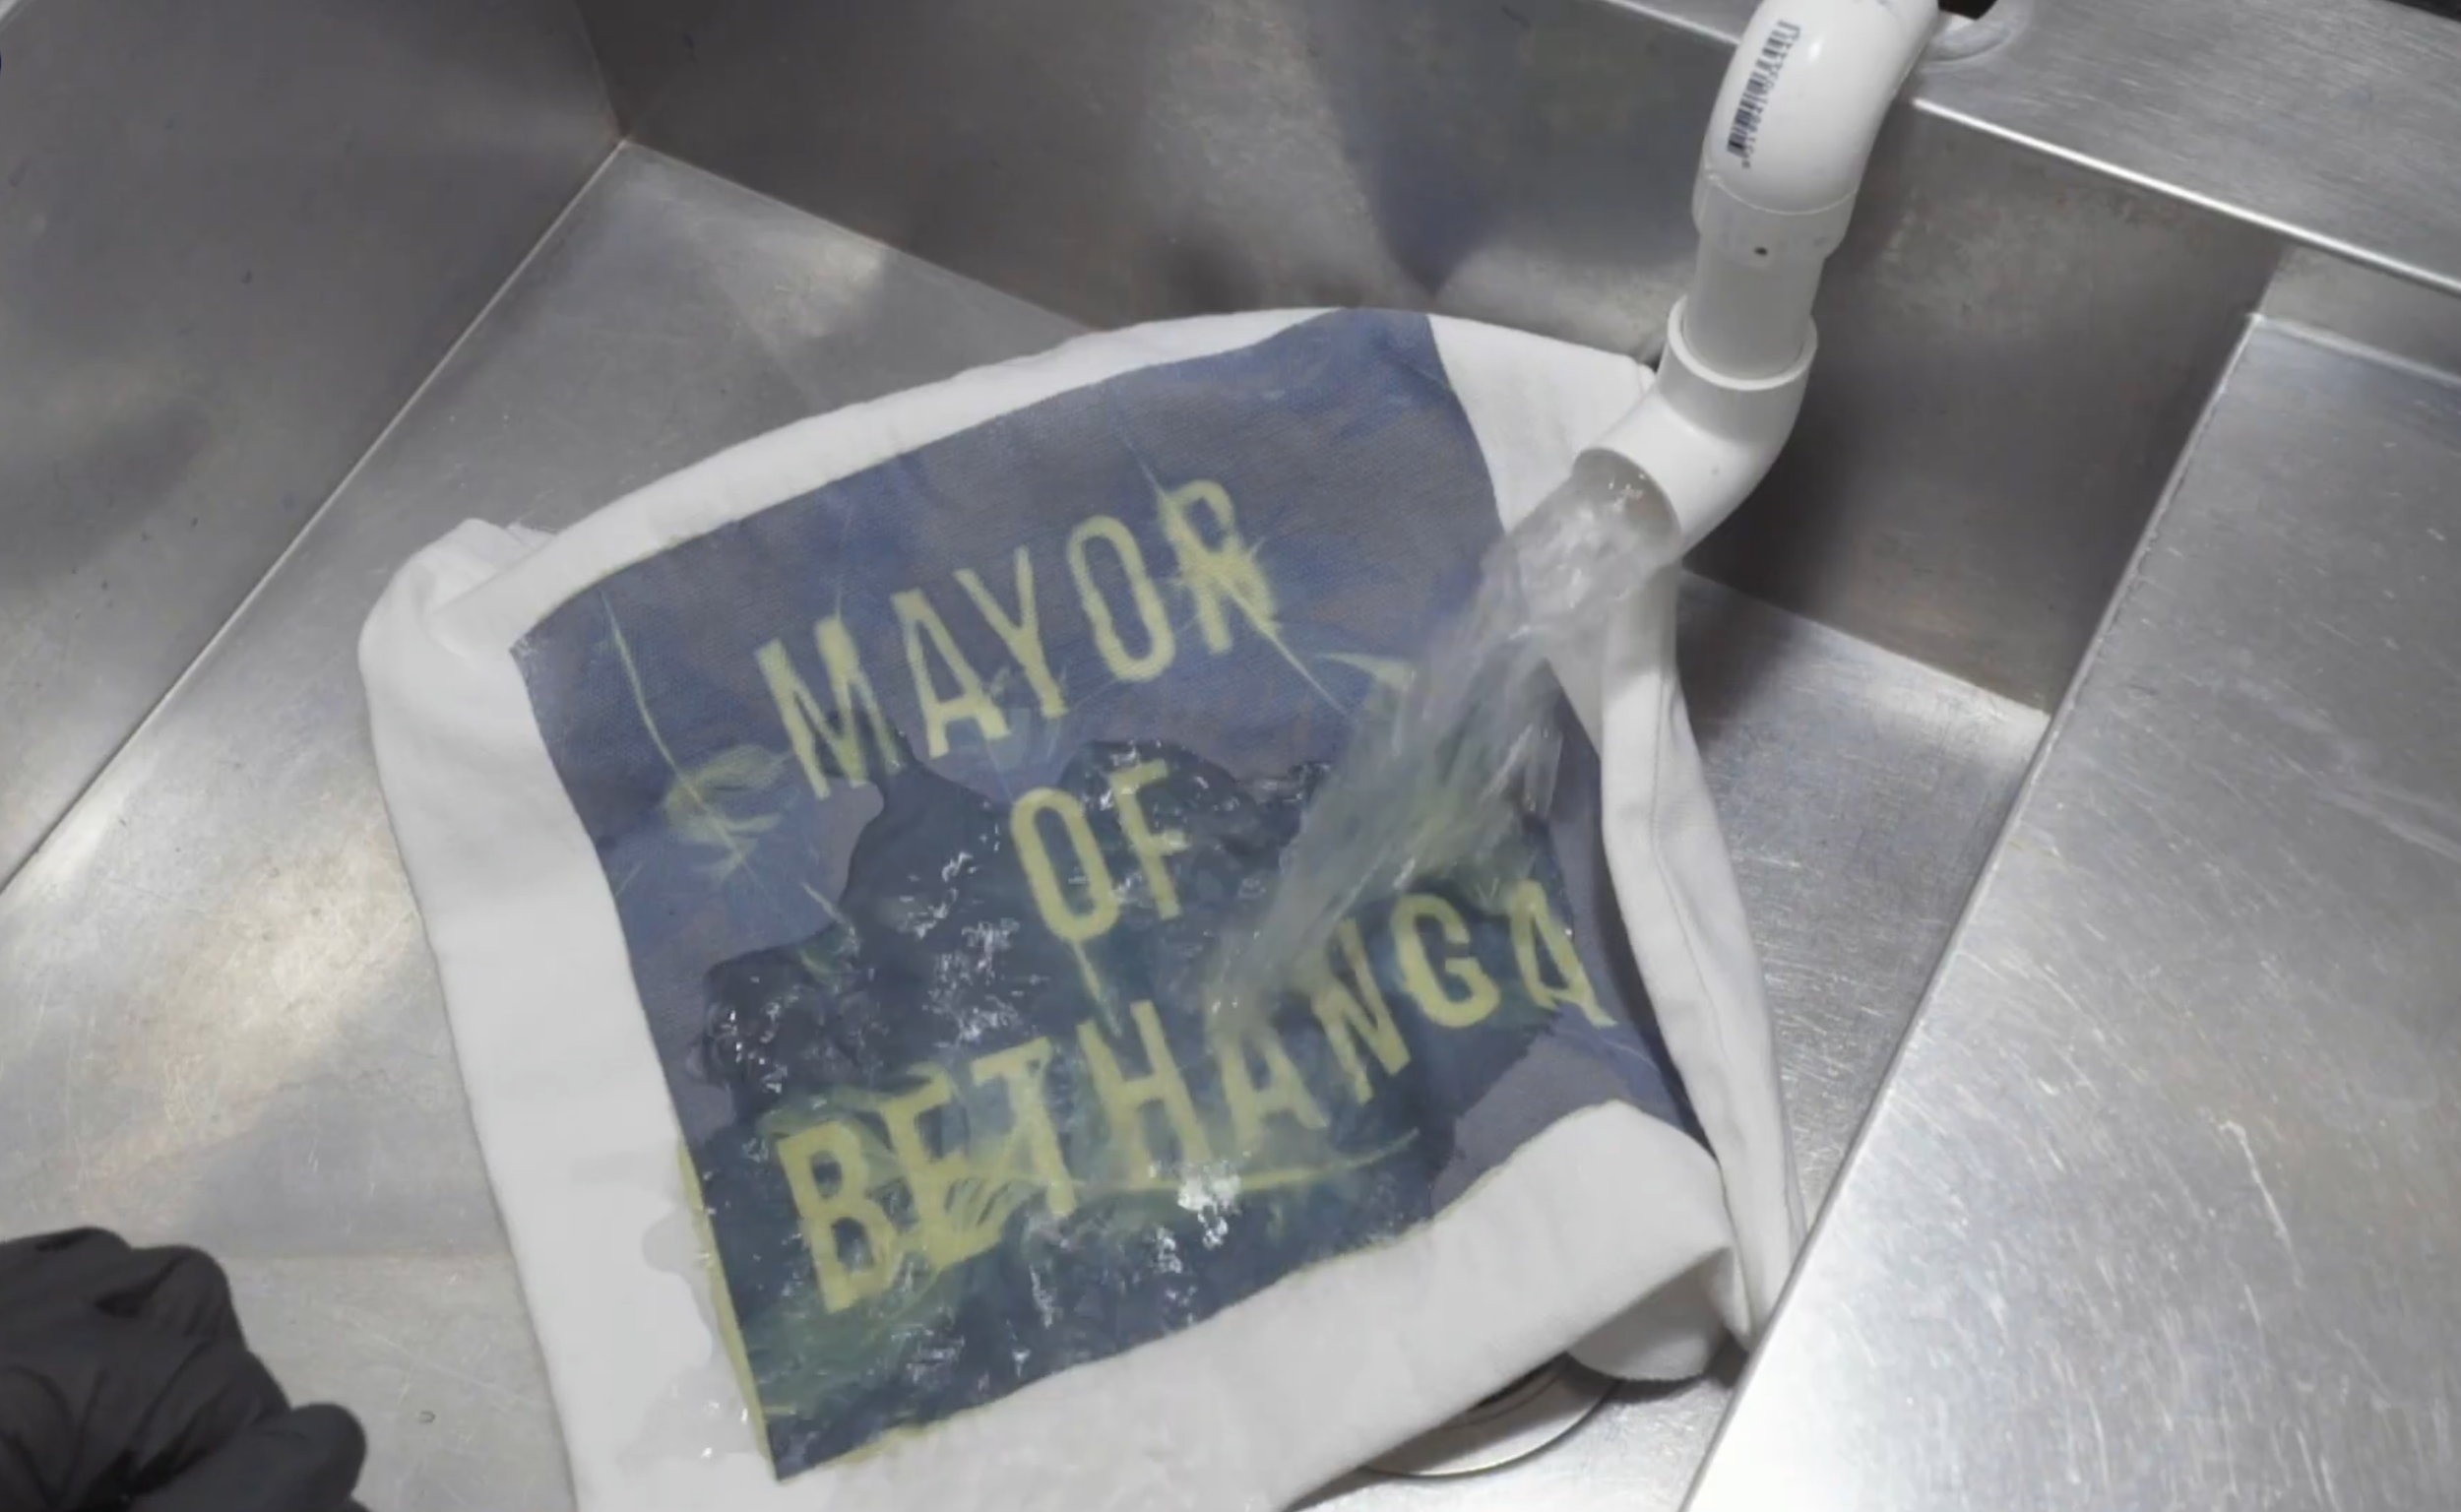
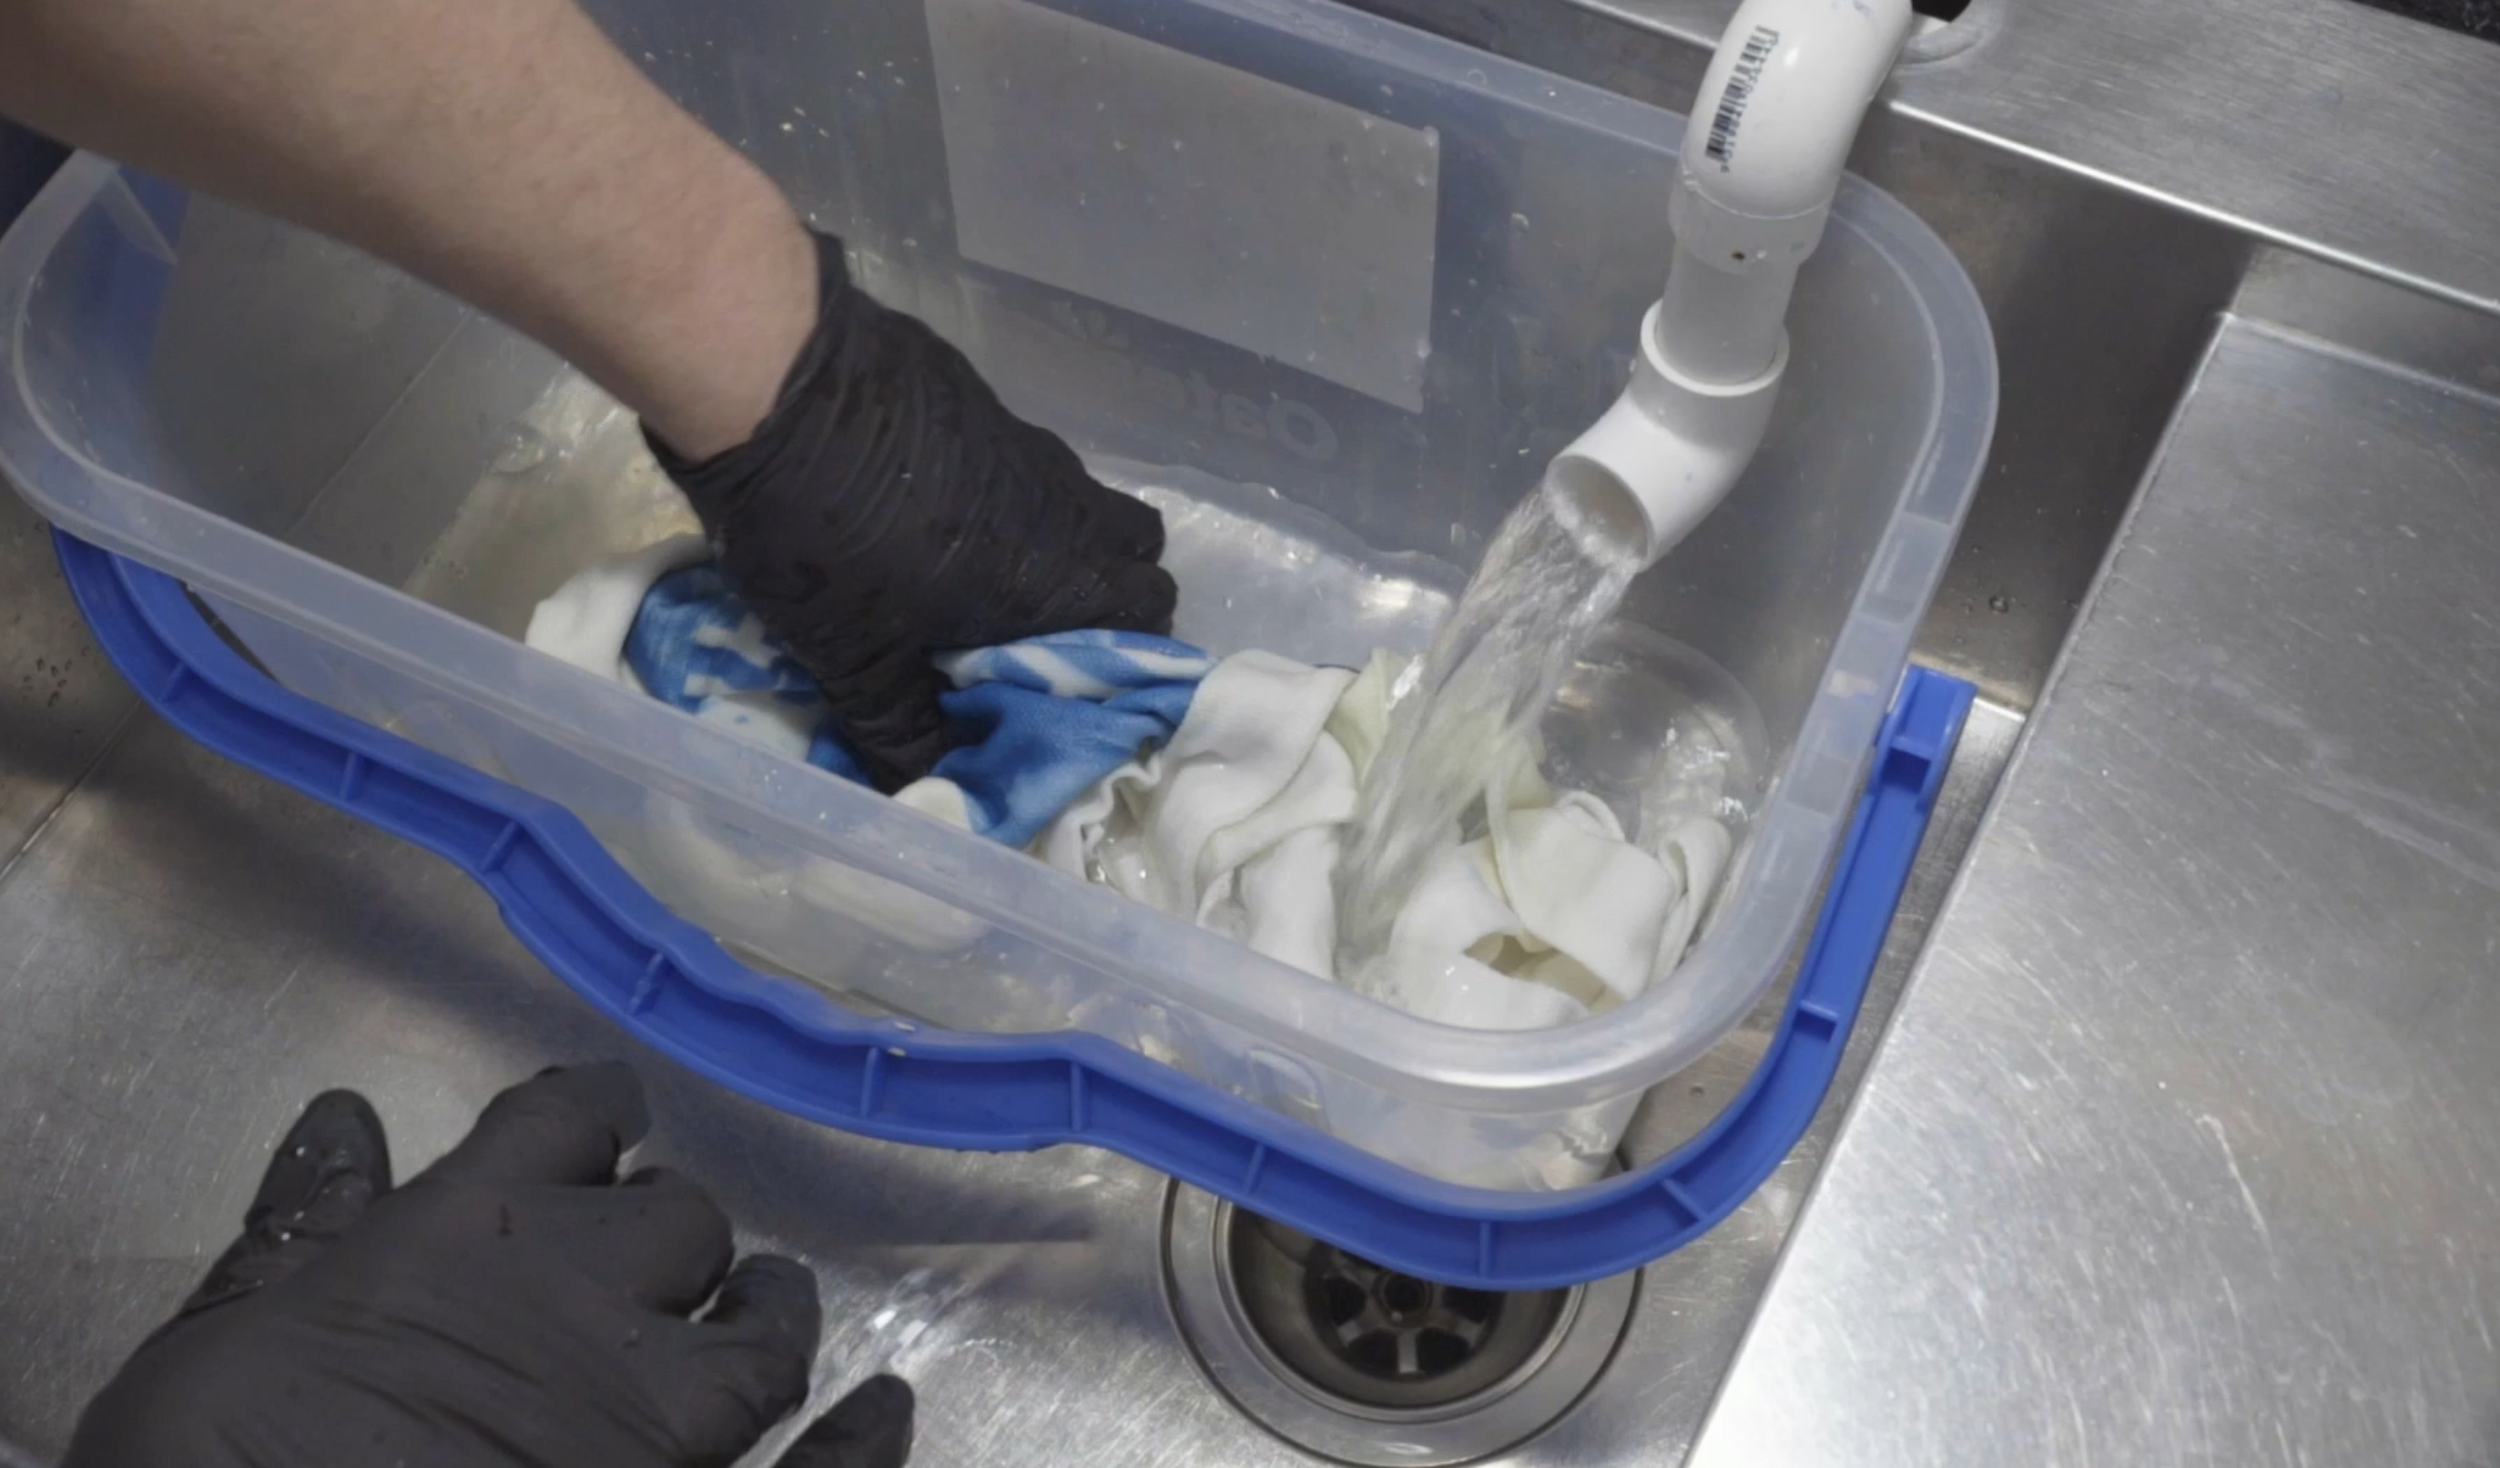
Washing the cyanotype is fairly straightforward. The most traditional method is washing in plain old tap water, just make sure you pop on on some gloves before you begin.
You need to wash the fabric until all unexposed solution has disappeared - this means you shouldn’t see any more green on the fabric or in the runoff water. This can sometimes take a while, and what I’ll normally do is give the bag a good wash under the tap, and then put it on a rinse cycle in the washing machine once I get home.
If you are wanting to shorten your exposure times, or your tap water is alkaline, you can substitute regular tap water for a citric acid wash. Add around 10 grams of citric acid per litre of water in your wash, and wash it in this bath first for about 5 minutes, and then regular tap water thereafter.
Before drying, I’ll also often give the bag a quick wash in a hydrogen peroxide bath, which speeds up the oxidisation of the chemistry and brings out the intense blues, I use about half a cap of 3% hydrogen peroxide solution to a bucket of water.
Step 6: Drying the cyanotype
With the fabric coated, exposed and washed, the only thing left to do is to let it dry. Place it somewhere with some good airflow, ideally out of direct sunlight to stop it exposing more IF you’ve accidentally not washed it well enough.
If you do notice any green in your drips while it’s drying, it means you haven’t managed to get rid of all the leftover solution, so give it another was for 5 minutes and continue to
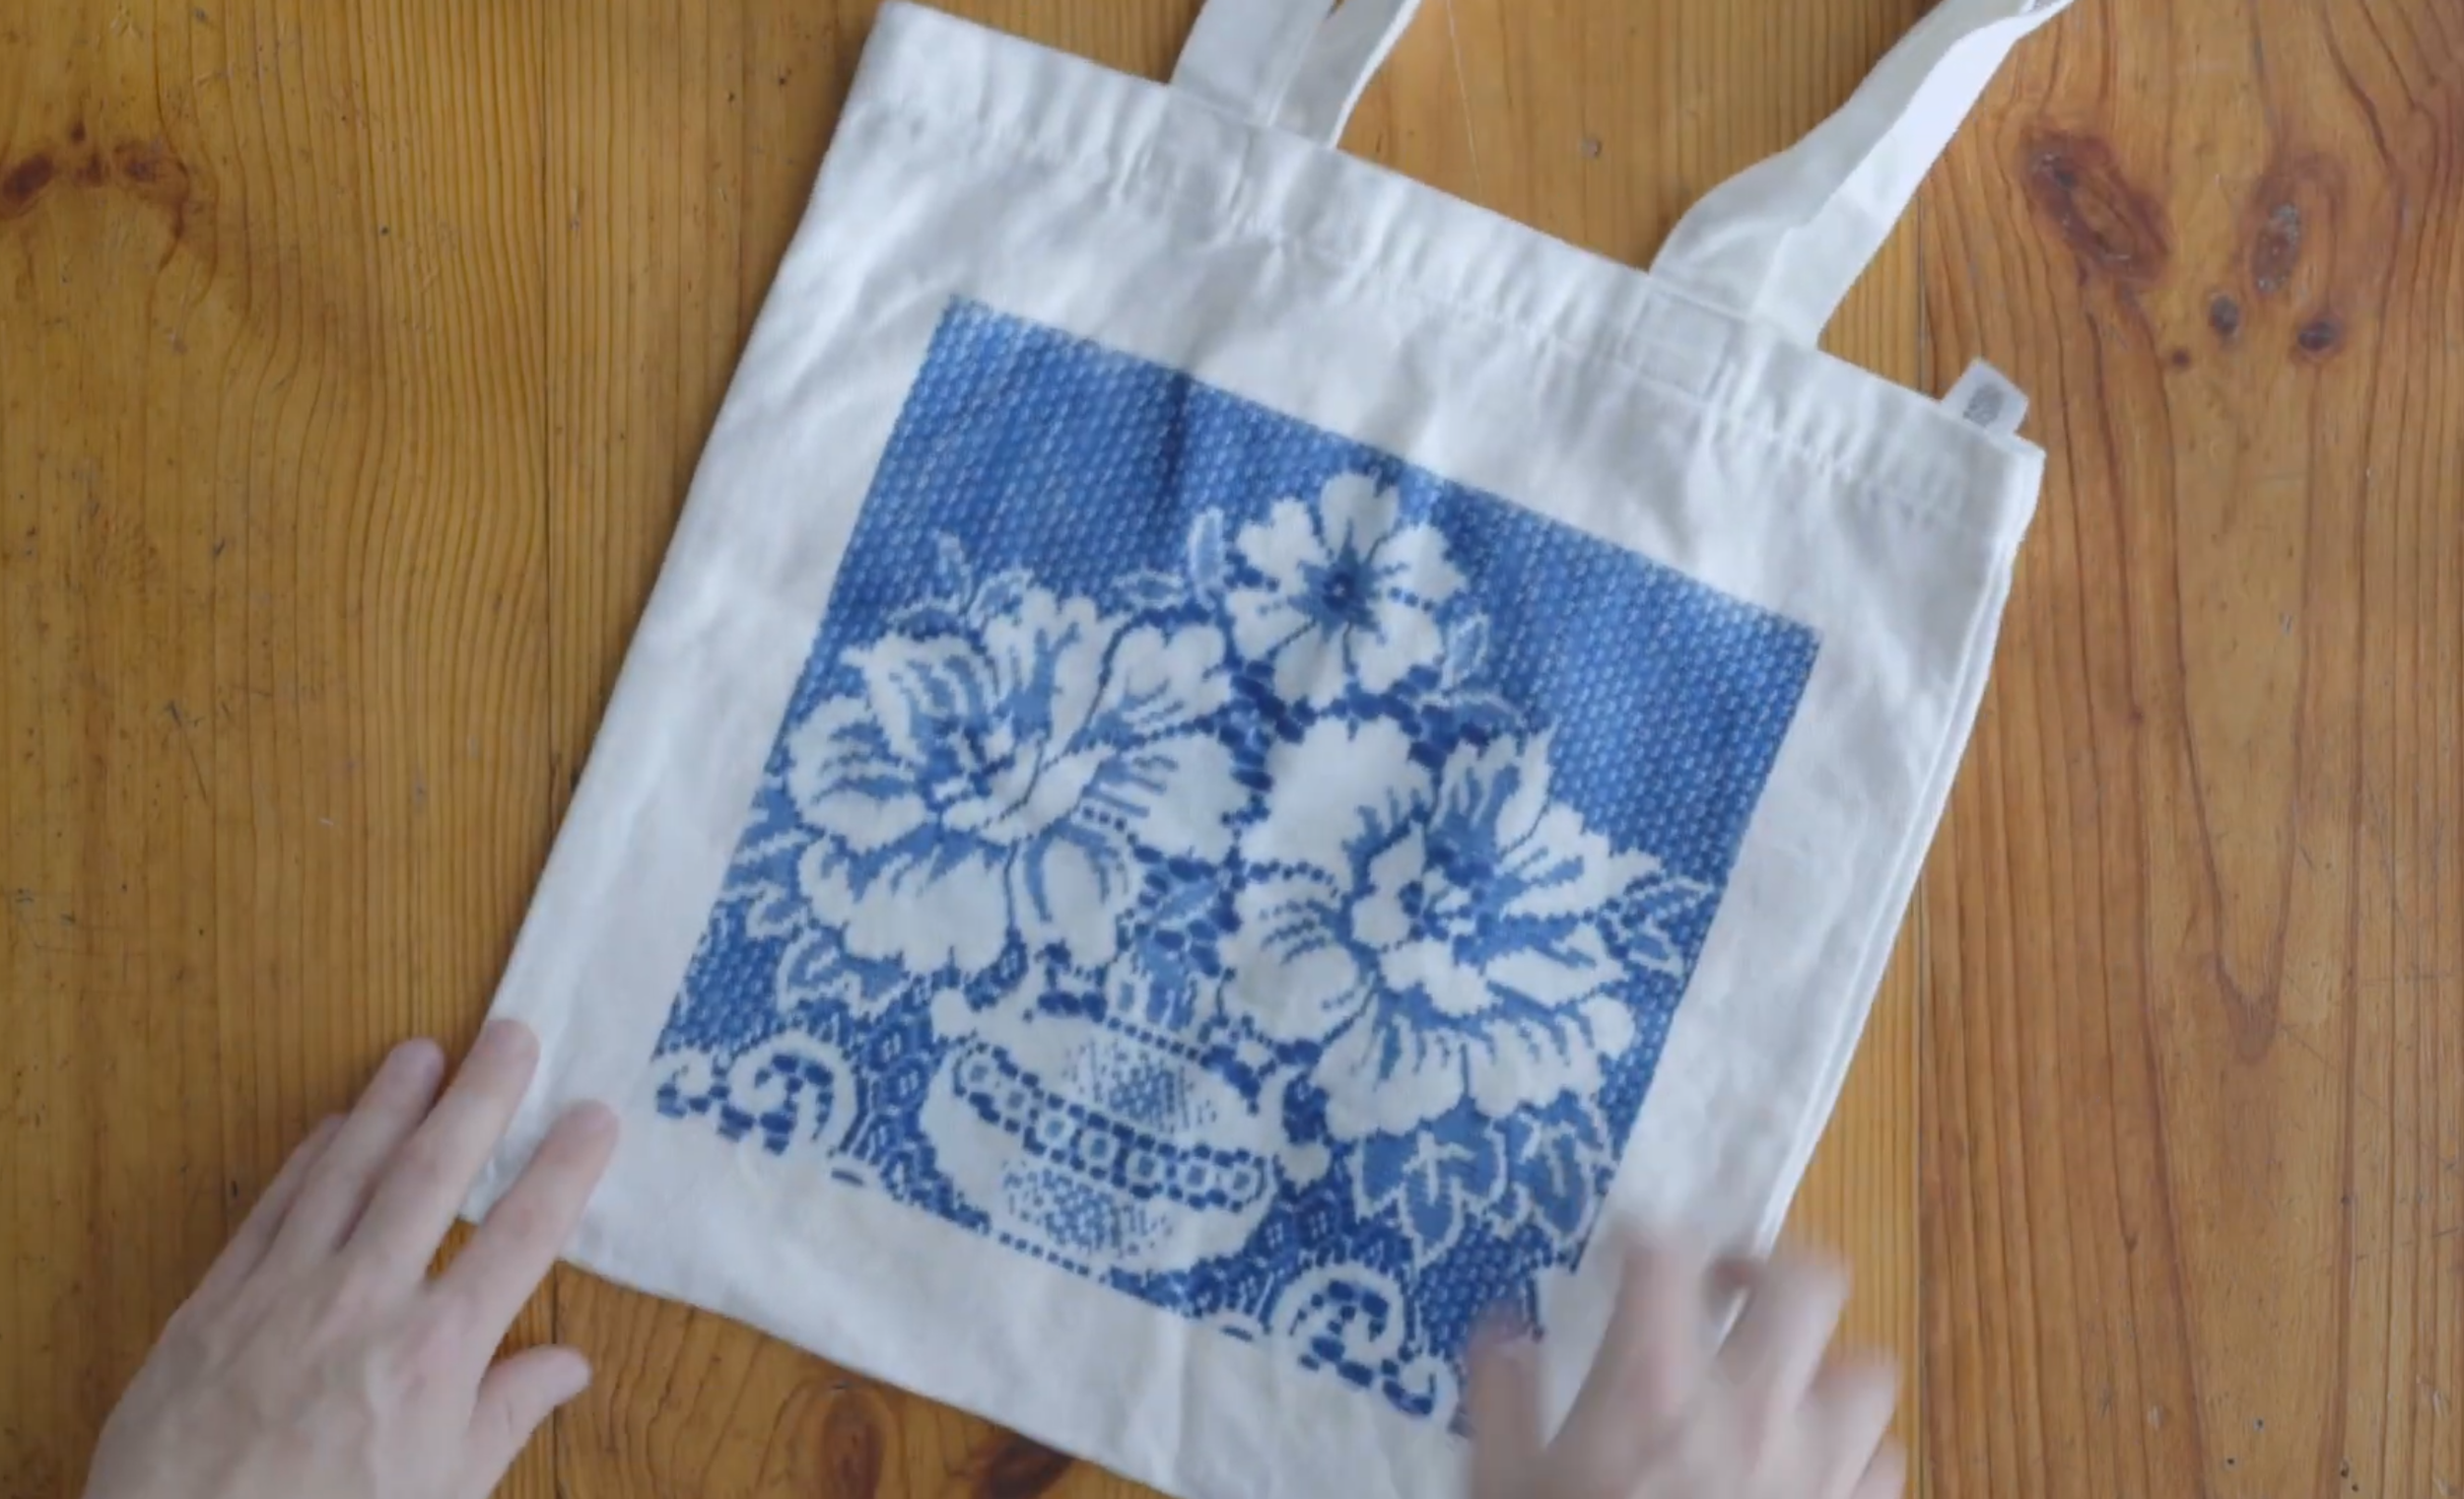
And now you’ve hopefully got a fabulous looking cyanotype on fabric! If things didn’t work out, take note of what you’ve done and make adjustments during the second round. Keep your cyanotype out of direct UV light, and if it gets dirty you can wash it, but it comes with some catches ( read the tips and troubleshooting below).
Tips and Troubleshooting your Cyanotype
Why is my cyanotype too dark or too light?
If your cyanotype is too light, it’s underexposed, so you need to increase your exposure time. If it’s too dark then it’s the opposite. When getting an initial exposure, you should make adjustments by a factor of 2, that is, halving or doubling your exposure time. Once you’ve gotten it to the right ballpark, then you can make smaller adjustments from there.
If your design is both too light in the highlights, AND too dark in the shadows, then it means your design is too contrasty. I find this happens quite a bit with digital negatives, as digital cameras capture a larger tonal range than what cyanotypes are capable of reproducing. To fix this issue, you’ll need to adjust the contrast of the negative, and it can be useful to go through a more complex testing process using test charts to find the tonal range of material and chemistry.
Can I wash my cyanotype?
The answer to this is yes, but with some significant things to consider. If you wash your cyanotype with regular laundry detergent it will bleach, and you’ll almost instantly lose the design you’ve worked so hard for. Instead try an eco-friendly washing detergent that’s free from phosphates, bleach, or sodium (but test this before committing to something you really love!)
You can also make cyanotypes much more machine washable by toning them. This toning process involves first bleaching the image, then adding colour back in with a toner, which for cyanotypes are things with tannins - tea, coffee, wine, etc. This changes the colour completely, so it isn’t ideal if you love blue, however makes the image much more resilient as it’s already been bleached, and makes the process more feasible on things that get washed regularly items, like t-shirts.
Regardless of what you do, washing cyanotypes will always result in some loss of image, so it should be done sparingly.
When washing my cyanotype the image disappeared?
This could happen for a couple of reasons. The first is that it hasn’t exposed for long enough, and this is easily fixed by just upping the exposure time. The other reason might be that the fabric you’ve chosen isn’t suitable - perhaps it doesn’t contain natural fibres, or it’s a blend. I’ve bought cheap bags before which claim to be 100% cotton which turned out to be a blend, so make sure you get fabric that’s of a reliable source and high quality.
How do I care for my cyanotype?
There are a few ways you can look after your cyanotype (though I wouldn’t stress about a lot of this stuff too much, you’ve made it to enjoy it!). Keep it out of UV light as this will cause it to fade over time, though the process is fairly slow. You can actually ‘recharge’ it slightly by keeping it in the dark after UV exposure, so consider keeping it in the cupboard between use.
There are lots of chemistries that will also bleach a cyanotype (such as an unfortunately aimed bird poo while it’s drying on the line). Keep it away from any cleaning chemicals as a general rule. If it does get bleached, there’s no way to bring it back to blue, however you can save the cyanotype through toning!